Food & Drink

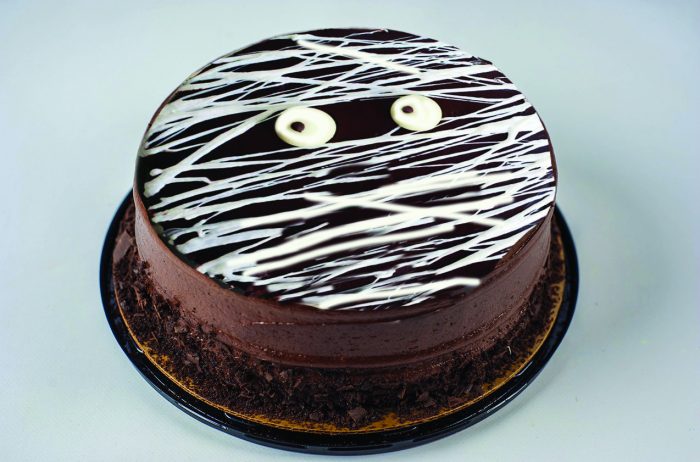
Black Magic Cake. Photo from METR)

Sweet treats are on display come Halloween. People hosting Halloween parties or bringing items over to others’ homes for the holiday may need to scare up some new ideas for dessert.

Chocolate never goes out of style and is right at home on Halloween. This recipe for “Black Magic Cake,” courtesy of The Food Network, is decadently rich. Don’t let all that chocolate frighten you. Drizzle as much melted marshmallow as necessary to brighten up the flavor. Turn into a mummy face or transform the top of the cake into a spiderweb instead.

Black Magic Cake

YIELD: 8 to 10 servings

INGREDIENTS:

2⁄3 cup vegetable oil, plus more for greasing the baking pans

1 cup Dutch-process cocoa powder (or any cocoa powder if on hand)

1 cup boiling water

2 cups granulated sugar

1 3⁄4 cups all-purpose flour (see cook’s note)

2  teaspoons baking powder

1   teaspoon fine salt

1  cup whole milk

2   large eggs

1  tablespoon pure vanilla extract

Filling and Frosting:

1 1⁄2  cups heavy cream

3⁄4  cup Dutch-process cocoa powder, sifted

8  ounces semisweet chocolate, chopped

1 teaspoon espresso powder

1 teaspoon pure vanilla extract

Pinch fine salt

2  tablespoons unsalted butter

1⁄3  cup confectioners’ sugar, sifted

Decoration:

2  cups mini marshmallows (about 4 ounces)

Cooking spray

1   or more candy spiders or two candy eyes for decorating

DIRECTIONS:

For the cake: Position an oven rack in the center of the oven and preheat to 350 F. Line the bottom of two 9-inch round cake pans with parchment and crease the parchment and the sides of the pans with oil.

Stir together the cocoa powder and boiling water in a small bowl and let sit to bloom for 5 minutes (this step intensifies the chocolate flavor in the cake).

Whisk together the granulated sugar, flour, baking powder and salt in a large bowl. Whisk together the bloomed cocoa, oil, milk, eggs, and vanilla in a medium bowl. Pour the cocoa mixture into the sugar mixture and stir until smooth (the batter will be thin). Divide the batter evenly between the prepared cake pans. Bake until the cakes bounce back when pressed in the middle and a toothpick inserted in the center comes out clean, 30 to 40 minutes. Let cool completely in the pans on a rack.

For the filling and frosting: Heat the cream in a double boiler over low heat, whisking occasionally, until it begins to steam. Whisk in the cocoa powder, chocolate, espresso powder, vanilla, and salt until the mixture is smooth, about 2 minutes. Whisk in the butter until melted. Whisk in the confectioners’ sugar until incorporated. Let the frosting cool completely.

To assemble: Put one cake, bottom-side up, on a serving plate or cake stand. Spread about 1 cup of the frosting over the top but not all the way down the side. Top with the other cake, bottom-side up, and frost the top and sides with the remaining frosting.

For the spider web or mummy decoration: Microwave the marshmallows in a microwave-safe medium bowl until they swell and are soft enough to stir, about 1 minute. Let sit a few minutes until cool enough to touch. Spray your hands with cooking spray. For a spider web, pick up a tablespoon-sized blob of the melted marshmallow and stretch it over and around the cake; repeat so that the strings of marshmallow crisscross one another in many directions. Continue until you have what looks like a spiderweb. For a mummy, stretch the marshmallow so that all the strings on the top of the cake run in the same direction, leaving a small gap between strings for the mummy’s eyes to peak out. Garnish with a candy spider or several candy spiders for the web cake or candy eyes for the mummy cake.

Cook’s note: The candy directions are a nice touch, but the cake will be fun and delicious without them as well. When measuring flour, spoon it into a dry measuring cup and level off the excess.

Semi-homemade tip: Purchase a premade chocolate cake and use the decoration to make the mummy or spiderweb only.

METRO photo

By Bob Lipinski

Bob Lipinski

Recently I was invited to a friend’s house for dinner and as we enjoyed a few appetizers, he served a bottle of a 1998 Australian Chardonnay from a winery I’ve never heard of. The wine was dark yellow and when tasted, it was well past its point of drinkability.

According to my friend, the wine was stored in his temperature-controlled cellar for over 10 years. He was dismayed to learn that some wines need aging, but the vast majority are best drunk when released for sale by the winery.

I explained that there is no precise answer when a wine will be at its peak because wines age at difference paces. The vintage, growing conditions, winemaking and barrel or stainless-steel aging, also plays a part in wine’s ability to age. The aging curve of wine depends on the location and conditions where the wine will be stored. Also, personal taste plays a significant role in the enjoyment of wine. As an example, many people enjoy champagne when first released with its youthful freshness, while others enjoy the more mature, bottle-aged versions.

Vintage charts and vintage reports, often touted by online sources, will provide you with a ballpark idea when the wine will be at its peak. They often say, “drink by this date or hold until that date.”

Wine’s longevity can be attributed to many factors, among them higher acidity, higher alcohol, carbonation, concentrated fruit, sugar (residual), and tannin, which is an antioxidant.

Not all wines are age-worthy, and in fact, most wines available for sale are not. Wines that benefit from years in the bottle (cellar) tend to be more expensive. I generally purchase several bottles of the same wine and after a few years, open one bottle and see if it’s approaching maturing. Then I decide (with some guesswork) when the next bottle should be opened.

Except for most Chardonnay, Riesling, and sweet wines, white wines should be consumed within three years after the vintage. Most red wines are best between four and seven years after the vintage. Red wines that can age much longer than seven years include Amarone della Valpolicella, Barbaresco, Barolo, Bordeaux, Brunello di Montalcino, Burgundy, Cabernet Sauvignon, and Chianti Classico Riserva.

My rule for aging wine is simple. I’d rather open a bottle of a young wine and say, “It tastes good now but will be better in ‘X’ years” rather than opening a bottle of wine aged for many years and say, “It was probably good several years ago, but now it’s over-the-hill!”

Bob Lipinski is the author of 10 books, including “101: Everything You Need To Know About Whiskey” and “Italian Wine & Cheese Made Simple” (available on Amazon.com). He consults and conducts training seminars on Wine, Spirits, and Food and is available for speaking engagements. He can be reached at www.boblipinski.com OR [email protected].

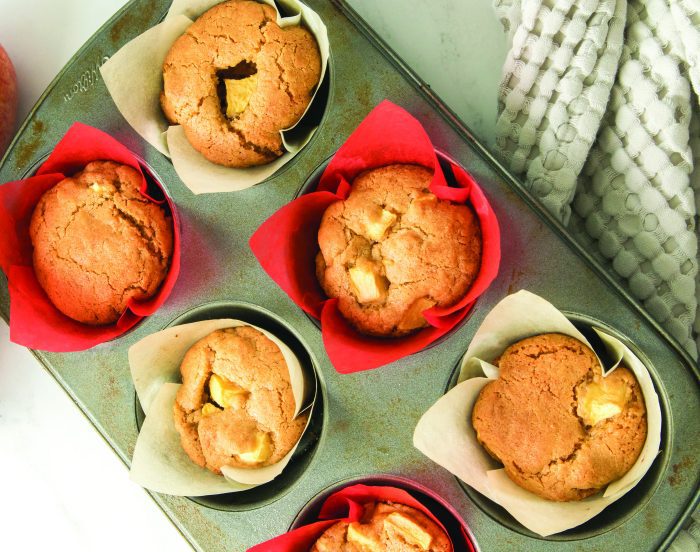
Apple Blondie Cupcakes Photo from Family Features

By Heidi Sutton

One of my favorite things to do in the fall is to pack the camera and take a drive out east to visit the many farm stands before the colder weather sets in. This always includes a visit to May’s Farm in Wading River for pumpkins and mums and a stop at Windy Acres in Calverton for their large variety of apples, including the Mutsu apple. Also known as Crispin apples, they originated from the Mutsu Province of Japan in the 1940s and are a cross between the Golden Delicious and the Indo apple. Large in size with a yellowish-green skin, they are sweet and juicy with a crisp texture, perfect for following recipes. 

Apple Blondie Cupcakes

Apple Blondie Cupcakes
Photo from Family Features

YIELD:  Serves 12

INGREDIENTS: 

1 1/4  cups all-purpose flour

1/2  teaspoon baking powder

1/2  teaspoon kosher salt

1/2  teaspoon cinnamon

1/4  teaspoon nutmeg

1/2  cup unsalted butter (1 stick), melted    and cooled 

1 cup light brown sugar, packed

1 teaspoon vanilla extract

1 large egg, at room temperature

2 large apples peeled, cored and diced 

DIRECTIONS:

Preheat oven to 350 F. Line a 12-count muffin pan with cupcake liners and set aside. In medium bowl, whisk flour, baking powder, salt, cinnamon and nutmeg. In a large bowl, whisk butter and brown sugar 2 minutes, or until well combined. Add vanilla and egg; whisk until incorporated. Add flour mixture to large bowl of wet ingredients. Stir until just combined; be careful to not overmix. Fold in diced apples. Spoon batter evenly into cupcake liners. Bake 18 to 22 minutes, or until toothpick inserted into center of cupcake comes out clean. Let cool before serving.

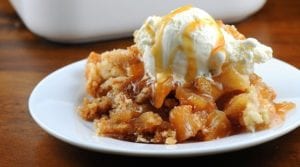
Apple Crisp(in)

YIELD: Makes 4 to 6 servings

INGREDIENTS: 

4 cups apples, pared and sliced

1/4 cup orange juice

1/4 cup sugar

3/4 cup flour

1/2 teaspoon cinnamon

1/3 cup butter

DIRECTIONS:

Preheat over to 375 F. Mound apples in a buttered pie plate and pour orange juice over them. In a separate bowl, combine sugar, flour, and cinnamon. Cut in butter until mixture is crumbly. Sprinkle mixture over apples. Bake for 45 minutes or until apples are tender and topping is crisp. Top with vanilla ice cream and serve.

Easy Apple Turnovers


Easy Apple Turnovers
Photo from METRO

YIELD: Makes 4 servings

INGREDIENTS: 

1 1⁄2 cups thinly sliced, peeled apples

1⁄4 cup packed brown sugar

2 tablespoons water

1 teaspoon lemon juice

1 tablespoon all-purpose flour

1 tablespoon granulated sugar

1⁄4 teaspoon salt

1 tablespoon butter or margarine

1⁄2 teaspoon vanilla

1 box Pillsbury™ refrigerated pie crusts

1 egg

DIRECTIONS:

In a 2-quart saucepan, mix apples, brown sugar, 1 tablespoon of the water and lemon juice. Cook over medium heat, stirring occasionally, until bubbly. Reduce heat to low; cover and cook 6 to 8 minutes, stirring occasionally, until apples are tender. In a small bowl, mix flour, granulated sugar and salt. Gradually stir into apple mixture, cooking and stirring until mixture thickens. Remove from heat; stir in butter and vanilla. Cool 15 minutes.

Meanwhile, heat oven to 350 F. Let pie crust pouch stand at room temperature for 15 minutes. Unroll crust on ungreased cookie sheet. Spoon cooled fruit mixture evenly onto half of crust to within 1⁄2 inch of edge.

In a small bowl, beat egg and 1 tablespoon water; brush over edge of crust. Fold untopped half of crust over apple mixture; firmly press edge to seal. Flute edge; cut small slits in several places in top crust. Brush top with remaining egg mixture.

Bake 25 to 35 minutes or until crust is golden brown. Serve warm or cool. Drizzle with icing, if desired.

Photo from Unsplash

By Matthew Kearns, DVM

Dr. Matthew Kearns

As Halloween approaches, we usually worry about chocolate toxicity, but let’s not forget about grape and raisin toxicity. Grapes and their dehydrated form, raisins, have been implicated in kidney damage (sometimes severe irreversible damage). There is also still debate as to how many grapes or raisins are toxic to pets. Let’s take a closer look at grape and raisin toxicity to see if we can shed some light on what we do know about this nebulous topic.   

Unfortunately, the exact toxic substance to dogs in grapes and raisins is still not completely known and neither the color of the grape, nor seeded versus seedless makes a difference. However, although this has not been completely verified, there has been somewhat of a breakthrough recently. 

A compound in grapes called tartaric acid has been speculated as the toxic culprit. Previously, experts felt that high concentration of a type of sugar component called monosaccharides was to blame, whereas others blamed a compound called tannins. Additional theories do not implicate anything in the grape itself, but rather the growth of certain fungi on the grape and toxins produced called aflatoxins, or pesticides sprayed on grapes.  

The toxic dose or quantity of grapes and raisins is also up for debate. There does seem to be a genetic component associated with which individual dogs are more sensitive grapes or raisins. An article published in 2009 reviewed the charts of almost 200 dogs over a 13-year period. The study found some dogs ate over two pounds of raisins without developing any signs of poisoning, whereas others developed irreversible kidney failure with as little as three grams of grapes or raisins. 

Just to give you some perspective as to what three grams is: your average grape weighs 5 grams, and a raisin weighs about 0.5 grams. As little as one grape or six raisins could be toxic to your dog. However, some dogs will not get sick, or require large amounts of grapes/raisins before any damage is done. A good rule of thumb is 1 grape/raisin per 10 pounds should be a concern.

There is no antidote once the patient starts showing symptoms so this is truly an example of, “an ounce of prevention is worth a pound of cure”. Symptoms of toxicity include lethargy, loss of appetite, vomiting, and increase in thirst/urination. These patients were less likely to make a full recovery. Some were euthanized before discharge. The patients that did better in the same 2009 study were those in which the owners witnessed the ingestion and brought to a veterinary clinic immediately where veterinarians were able to induce emesis (force vomiting) and give activated charcoal ASAP. 

In conclusion, although veterinarians are closer to determining the toxic component (tartaric acid), we are not sure why some dogs are more sensitive than others and what is a toxic dose. Therefore, keep grapes and raisins away from your dog when possible and, if you witness your dog eating grapes or raisins, bring him or her immediately to your veterinarian’s office or an emergency clinic for treatment.  

Dr. Kearns practices veterinary medicine from his Port Jefferson office and is pictured with his son Matthew and his dog Jasmine.

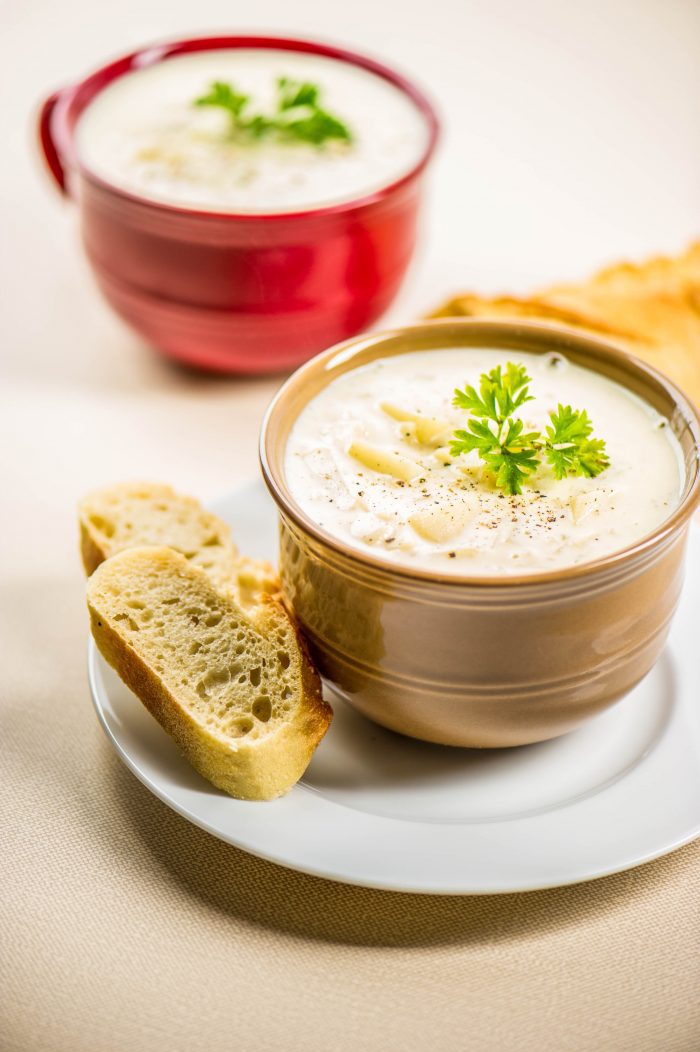
Setauket Clam Chowder. METRO photo

By Barbara Beltrami

Dear Reader, I’m sorry to say that this is my last Cooking Cove column. Sharing my recipes and anecdotes with you and getting your enthusiastic positive feedback has made these past six years a labor of love. I will be continuing to write a cooking column independently and hope that you will join me by sending your name and email address to me at [email protected] so we can keep cooking together.  Meanwhile it’s only fitting and proper that I share my recipes for a few of my favorite things for a farewell dinner.

Champagne Cocktail

YIELD: Makes 2 cocktails

INGREDIENTS: 

12 ounces Champagne or Prosecco

2 sugar cubes

10 dashes Angostura bitters

2 long thin curly lemon peels

DIRECTIONS:

Chill the champagne or Prosecco thoroughly. Place sugar cubes in glasses, add the bitters to the sugar cubes, drop in the lemon peel, then pour champagne. Serve immediately with fresh oysters, smoked salmon or caviar.

Setauket Clam Chowder

YIELD: Makes 8 to 10 servings

INGREDIENTS: 

2 dozen cherrystone clams, scrubbed, purged

4 ounces unsalted butter

1 leek, light green and white part only, washed and thinly sliced

3 potatoes, peeled and sliced thin

1/2 cup dry white wine

Large sprig fresh thyme

1 bay leaf

2 cups half and half

Freshly ground black pepper to taste

1/3 cup chopped Italian flat leaf parsley

DIRECTIONS:

Place clams in a large pot and add one quart water. Cover and cook over medium-high heat about 10 to 15 minutes, until clams open. Discard any that don’t open after 15 minutes. Remove clams from liquid and set aside to cool. Strain broth through a sieve or strainer lined with paper towels or cheesecloth; set that aside too. Rinse out pot, dry, then over medium heat melt butter, add leeks and, stirring frequently, cook until they are softened but not browned, 5 to 10 minutes. 

Stir in potatoes and wine and continue cooking until potatoes start to soften and wine is evaporated, 5 to 10 minutes. Add enough clam broth to cover potatoes, plus thyme and bay leaf; partially cover and simmer until potatoes are tender, about 10 to 12 minutes. Meanwhile, remove clams from shells and dice; add them along with the half and half and ground pepper to the pot, bring back to a simmer but do not boil. Stir in parsley, ladle into bowls and serve hot with oyster crackers and corn on the cob.

Sage-Stuffed Roast Chicken

YIELD: Makes 8 servings

INGREDIENTS: 

One 5-pound organic roasting chicken

Coarse salt and freshly ground pepper to taste

1 large bunch sage

1 lemon, halved and seeded

1 head garlic, halved horizontally

1/4 cup unsalted butter

2 large onions, coarsely chopped

4-6 carrots, sliced diagonally into chunks

15-18 small sprigs sage

1/4 cup olive oil

DIRECTIONS:

Preheat oven to 425 F. Remove giblets, neck and excess fat from chicken; rinse inside and outside under cold water and pat dry. Generously salt and pepper chicken cavity, then stuff cavity with large sprig of sage, lemon and garlic. Tie legs together with kitchen twine and tuck wing tips under the chicken. 

In a large bowl toss the onions and carrots with the small sage sprigs and olive oil and salt and pepper. Spread mixture on bottom of shallow roasting pan, then place chicken over them. Roast for an hour and a half, until a cut between thigh and leg yields clear juices; remove from oven and let rest about 15 minutes, then slice and serve with onions and carrots any liquid from pan spooned on top. Serve warm with roasted potatoes and a green vegetable such as Brussels sprouts or broccoli.

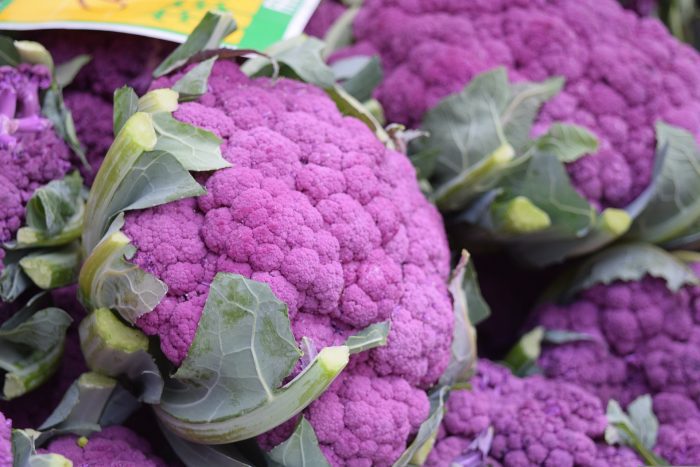
Purple cauliflower. Pixabay photo

By Barbara Beltrami

Once upon a time, many years ago, the East End of Long Island was densely populated with farms that grew potatoes and cabbages and cauliflower. Even though most of them have become vineyards, there are still a few that continue to produce the original crops, and Long Island cauliflower, whether the familiar white common variety or the purple, green or orange ones that are the harbingers of autumn, tastes virtually the same, although some people say the purple has a slightly nuttier taste. All are members of the cruciferous family which makes them great sources of vitamin C, and purple cauliflower is especially good for the anti-oxidants it contains. Whatever color you choose, you’re in for a veggie treat and a good dose of healthy nutrients.

Roasted Purple Cauliflower

YIELD: Makes 6 to 8 servings

INGREDIENTS: 

1 large head purple cauliflower

1/4 cup extra virgin olive oil

Salt and freshly ground pepper to taste

2/3 cup grated Parmigiano cheese

1/3 cup toasted pignoli nuts

DIRECTIONS:

Preheat oven to 400 F. Line a baking sheet with parchment. Slice cauliflower lengthwise through the core into 4 to 6 one-inch steaks. Brush both sides with olive oil, sprinkle with half the salt and pepper, then half the cheese. Bake about 15 minutes, until top is golden, then flip, sprinkle with remaining salt and pepper and cheese and bake another 15 minutes or so until that surface is golden and bubbly. Remove from oven, transfer to serving dish and sprinkle with toasted pignoli nuts. Serve with any meat, fish, poultry or vegetable protein.

Giardiniera

YIELD: Makes 6 to 8 cups

INGREDIENTS: 

1/2 head cauliflower cut into small florets

2 carrots, peeled and cut diagonally into 1/4” slices

2 celery ribs, trimmed and cut into 1/4” slices

1 red bell pepper, seeded and diced

2 garlic cloves, sliced thin

1 jalapeno pepper, seeded and minced

2 cups white vinegar

1 cup water

2 tablespoons sugar

Kosher salt to taste

2 bay leaves

2 teaspoons celery seeds

2 teaspoons fennel seeds

1 tablespoon dried marjoram

DIRECTIONS:

In a large bowl, toss together cauliflower, carrots, celery, bell pepper, garlic, and jalapeño pepper; pack into glass jars. In a medium saucepan over medium heat, combine vinegar, water, sugar, salt, bay leaves, celery seeds, fennel seeds and marjoram; stir well and bring to a boil. Once it boils, remove from heat, remove bay leaves and pour liquid over vegetables in jars. Let cool completely, place lids on jars, and refrigerate for up to one week. Serve with assorted salamis, prosciutto, and hard cheeses.

Cream of Cauliflower Soup

YIELD: Makes 4 to 6 servings

INGREDIENTS: 

1/4 cup unsalted butter

White part only of one leek, rinsed and sliced

1/4 cup flour

1 quart chicken broth

1 head cauliflower broken into bite-size florets

1 potato, peeled and diced

Freshly ground white pepper

2 cups cream

1 tablespoon minced fresh sage leaves

1 tablespoon snipped fresh chives

DIRECTIONS:

In a large saucepan, melt butter over medium heat, add leeks and saute until tender, about 6 minutes. Stirring constantly, add flour until mixture forms a paste, then, still stirring constantly, gradually add chicken broth, cauliflower, potato and  ground pepper. Bring mixture to a boil; reduce heat to medium-low and simmer about 15-20 minutes, until cauliflower and potato are very tender. Remove from heat and let sit to cool slightly. In small batches ladle into bowl of food processor and puree; return pureed mixture to saucepan. Stirring constantly, add cream and bring just to a simmer; reduce heat to low and simmer about 15 minutes, until it starts to thicken. Stir in herbs and serve hot, cold or at room temperature with focaccia.

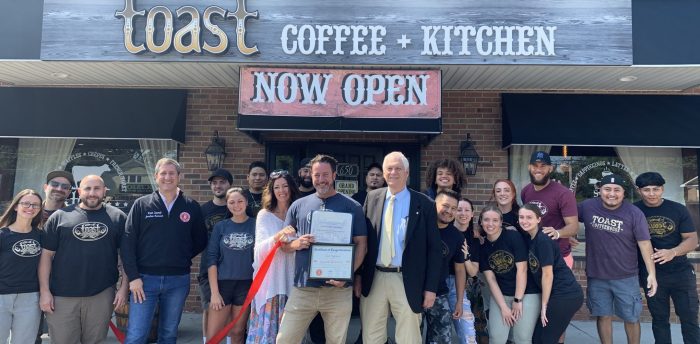
Toast Coffeehouse held a ribbon cutting on Sept. 9. Photo from Town of Brookhaven

Town of Brookhaven Councilmember Jonathan Kornreich and NYS Assemblyman Steve Englebright attended the grand re-opening of Toast Coffeehouse at its new location at 650 Route 112 in Port Jefferson Station on Sept. 9. 

Owners Terence and Jennifer Scarlatos opened their first restaurant in downtown Port Jefferson in 2002 and have been growing their business ever since, with additional locations in Patchogue and Bay Shore. 

“As Port Jefferson Station continues to flourish, I’m seeing more and more interest from business owners in starting up there or relocating to the area. Terry and Jennifer Scarlatos are experienced restaurateurs with a strong aesthetic vision and deep operational experience. I have every confidence they will be successful and that their new location will enhance life here in Port Jefferson Station. They say breakfast is the most important meal of the day and Toast is a great place to enjoy it with friends and family. The food is amazing,” said Councilmember Kornreich.

“We are humbled and full of gratitude for the warm welcome into our new home in Port Jefferson Station by our local community and die-hard fans. We look forward to many years and memories here,” said Terry Scarlatos.

Pictured front row from left, Melissa Reinheimer, Evan Castillo, Councilmember Kornreich, Chanelle McGourty, Jennifer Scarlatos, Terry Scarlatos, Assemblyman Englebright, Eleuterio Hernandez, Katelyn Gray, Madison Graupman, Nicole Short, Erick Hernandez, Alexis Zuniga-Gomez. Pictured back row, left to right are Dave March, Branden Tabbitas, David Martinez, Mario Fuentes, Lorenzo Cabrera, Aidan Johnson, Jessica Giannotti, Lewis Flores Antigua. 

Restaurant hours are 8 a.m. to 3 p.m. Monday through Friday and 7:30 a.m. to 3:30 p.m. on weekends. For more information, call 631-331-6860 or visit www.ToastCoffeeHouse.com.

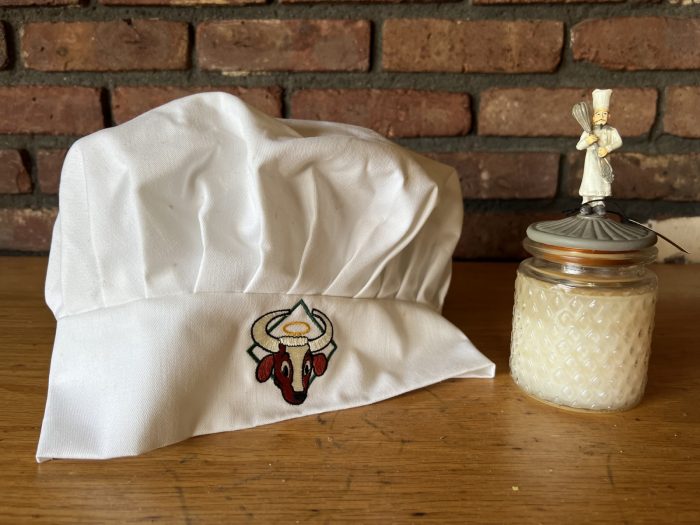
A chef's hat and a candle are two of the items being auctioned off.
One of two Good Steer wall signs being auctioned off.

Here’s your chance to own a unique part of Long Island history. Trading Post Estate Sales is currently holding an online auction, The Good Steer: Saying Goodbye to a Legend, through Oct. 1 at 8:15 p.m. Many contents of the Lake Grove restaurant, which closed its doors in July after 65 years in business, are for sale to the highest bidder (over 170 items) and include pictures, knick-knacks, chairs, kitchen equipment, toy cars and holiday items.

Click here to view the items.

For more information, visit www.auctionninja.com.

by -
0 1163
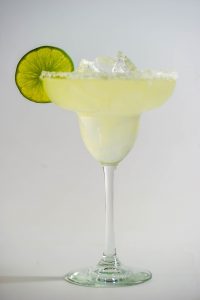
Margarita
Bob Lipinski

By Bob Lipinski

“One tequila, two tequila, three tequila, floor.”  — George Carlin

There are many stories as to the origin of the Margarita cocktail. One story states that Danny Negrete, the manager at the Garci Crespo Hotel in Puebla, Mexico, created it for his girlfriend in 1936. Others believe it was created in 1938 in Rosarito Beach, Tijuana and named after showgirl Marjorie King, who was allergic to many distilled spirits except tequila. Danny (Carlos) Herrera, the bartender, kept inventing new and exciting ways to serve tequila so Marjorie would not be bored.

Another story has it created by a Virginia City bartender in memory of his girlfriend who was accidentally shot during a barroom brawl. A further legend places the birth of this cocktail in Hollywood in the 1940s by Enrique Bastante Gutierrez, a former cocktail champion who mixed drinks for some of the world’s most famous film stars. Actress Rita Hayworth (whose real name was Margarita Carmen Cansino) was one of his loyal customers and he invented the drink especially for her.

Another version of its origin has the cocktail made by bartender Don Carlos Orozco at Hussong’s Cantina, in Ensenada, Mexico, who named it after his girlfriend. Yet another story takes place on July 4, 1942, in Juárez, Mexico, where Francisco “Pancho” Morales, a bartender in Tommy’s Place, a favorite hangout for GIs from Fort Bliss, concocted the cocktail. According to Pancho, a woman entered the premises and ordered a cocktail called a Magnolia. He didn’t know the ingredients, so he whipped together his own version of a Magnolia and called it a Margarita, Spanish for daisy. 

The most plausible version has the Margarita created in 1948 in Acapulco, Mexico, by a San Antonio, Texas socialite Margarita Sames. To impress Nicky Hilton, of the Hilton Hotel family, she mixed three parts tequila, two parts Cointreau, and one-part lime juice.

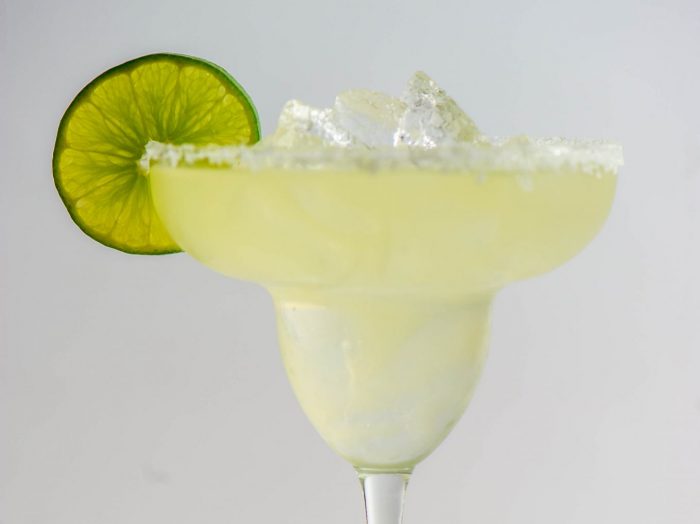
Margarita
Margarita

Yield: Makes one cocktail

Ingredients:

1-1/2 ounces tequila

1-ounce triple sec liqueur (minimum 60 proof)

3/4 ounce freshly squeezed lime (or lemon juice)

coarse salt for the rim of the glass

crushed ice

slice of lemon as a garnish

Directions:

Either shake the ingredients or put into a blender.  Then, take a wide-brim glass and place it upside down in a small bowl containing lemon or lime juice and then into another bowl that contains salt to a depth of ¼-inch, which leaves a thin layer on the rim of the glass. Fill the glass and garnish with lime or lemon slice and serve.

Bob Lipinski is the author of 10 books, including “101: Everything You Need To Know About Whiskey” and “Italian Wine & Cheese Made Simple” (available on Amazon.com). He consults and conducts training seminars on Wine, Spirits, and Food and is available for speaking engagements. He can be reached at www.boblipinski.com OR [email protected].

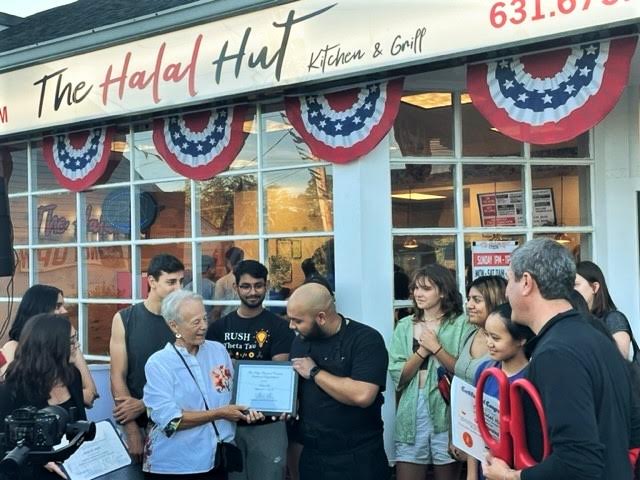
The Halal Hut. Photo from TOB

The community came out to celebrate the grand opening of The Halal Hut in Stony Brook on Sept. 2 with a ribbon cutting ceremony attended by members of the Three Village Chamber of Commerce and Brookhaven Town Councilmember Jonathan Kornreich. 

Located at 1075 North Country Road, the business is the second location in Brookhaven Town along with The Halal Hut at 1327 Middle Country Road in Centereach. 

The Halal Hut menu includes homemade recipes influenced by multiple cultures using only fresh ingredients. During the event, Councilmember Kornreich presented a Town of Brookhaven Certificate of Congratulation to The Halal Hut co-owner Daiyan Chowdhury.

Councilmember Kornreich said, “Congratulations on an exciting new addition to the Three Village food scene. The food is delicious, and I can report that these guys know how to throw a party. That was one of the best and most delicious ribbon cuttings I’ve been to.”

Pictured from left to right are Emily Murphy, representing NYS Assemblyman Steve Englebright; Jane Taylor, Executive Director of the Three Village Chamber of Commerce; The Halal Hut co-owner Daiyan Chowdhury; and Councilmember Kornreich (holding the scissors).