Tags Posts tagged with "recipe with video"

recipe with video

by -
0 782

A Cheesy Winter Warm-Up

(Family Features) One of the easiest ways to warm up at the end of a winter day – both inside and out – is by sharing a comforting meal with loved ones.

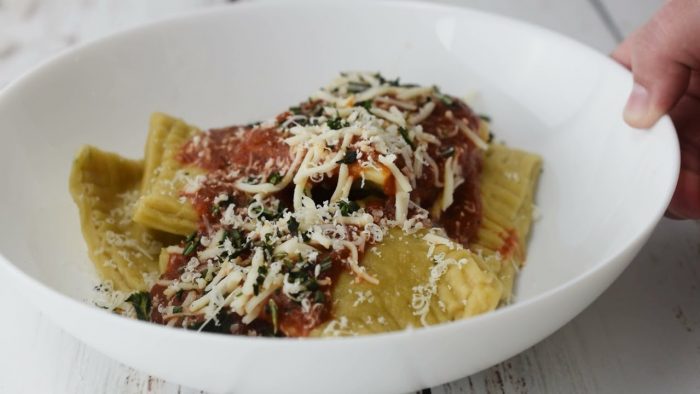
Getting your whole family to the table can be surprisingly easy when a savory dish like Cheesy Spinach Ravioli awaits. This recipe offers a kid-friendly way to get a serving of greens along with favorite flavors. Originally started by an Italian mother more than 80 years ago, having a delicious jar of RAGÙ sauce in hand, with its distinctive yellow cap, can help anyone create this mouthwatering recipe and quick real-world dishes at home.

Having a go-to jar of sauce in your pantry offers an invaluable resource for at-home cooks who want to “cook like a mother” and create delicious, homemade recipes regardless of culinary skill. With a wide array of flavor varieties, the rich heritage of these familiar sauces can quickly help you make cold days feel far away while elevating everyday meals at the family table.

Visit Ragu.com to find more winter recipe inspiration.

Cheesy Spinach Ravioli

Prep time: 10 minutes

Total time: about 1 hour

Yield: 17-20 ravioli

Ingredients:

Dough:

3 cups all-purpose flour, divided

1 pinch salt

1/4 teaspoon garlic powder

1/2 teaspoon olive oil

4 whole eggs

2 egg yolks

water

Filling:

1/2 teaspoon olive oil

2 cups chopped spinach, fresh or frozen

1 pinch salt

1 pinch pepper

1 container (15 ounces) ricotta cheese

Toppings:

1 jar (24 ounces) RAGÙ Old World Style Traditional Sauce

shredded mozzarella cheese

2 chopped basil leaves

2 chopped sprigs rosemary

grated Parmesan cheese (optional)

Directions:

To make dough: Place 2 1/2 cups flour in bowl and make hole in center. Add salt, garlic powder, olive oil, eggs and egg yolks to hole. Slowly bring flour into middle and knead into ball. Cover with bowl and let rest 20 minutes.

To make filling: In pan over medium heat, add olive oil; add spinach, salt and pepper then saute until spinach is wilted. Let cool then mix in ricotta cheese; set aside.

Cut dough in half. Sprinkle remaining flour on large cutting board and roll dough to 1/8-inch thickness. Cut into rectangle then cut into 2-3-inch squares. Set scraps aside. Brush water on squares then spoon 1 teaspoon spinach-ricotta filling in center of every other square. Top with remaining squares. Use fork to crimp edges. Repeat with remaining dough. Form scraps into ball and repeat. 

Put ravioli in boiling water, 8-10 minutes; they will rise to top when done.

In saucepan over medium heat, heat sauce until simmering.

Place ravioli on plate and top with warm sauce, mozzarella cheese, basil and rosemary. Grate Parmesan cheese on top, if desired.

See video here.

Chocolate Dipped Candied Orange Peels

                                                Recipe courtesy of Brandi Milloy on behalf of Sunkist

Chocolate Dipped Candied Orange Peels

Prep time: 5 minutes
Cook time: 1 hour
Servings: 4

Ingredients:

4 Sunkist Navel oranges
3 cups water
1 1/2 cups sugar
1 teaspoon vanilla extract or vanilla bean paste
1 cup dark chocolate, melted

Directions:

Rinse and dry oranges. Slice both ends off each orange. Using paring knife, carefully score each orange in quarters then remove peel from each section, trying not to get too much pith. Slice peels into 1/4-inch strips. Add to pot and cover with water and sugar; stir. Bring to boil. Turn heat to medium-low until water reaches soft simmer. Simmer 45 minutes. Add vanilla before turning off heat and stirring. Remove peels from syrup and cool on wire rack. Roll in sugar to coat. Dry at least 4 hours, or overnight. Dip candied orange peels one at a time in dark chocolate. Place on parchment paper to set up and harden. Store in airtight container.

See video here.

by -
0 614
Caramel Sticky Rolls

A straightforward weekend breakfast

(Culinary.net) There are no alarms set and you are cuddled up in bed after a good night’s sleep. It’s late morning and there is nowhere to go, no rushing around to do. No school bus, no work to be done, just relaxing at home with loved ones. However, breakfast is calling your name.

Your stomach rumbles as your stumble toward the kitchen. You need something quick and effortless. The kids will be up soon and you know food will be on their minds.

When you’re in a pinch, there is nearly nothing better to make than something sweet and filling for a weekend family breakfast.

Try these simple and delicious Caramel Sticky Rolls for an easy breakfast for all. The rolls are fluffy, a little crunchy and drizzled with caramel topping. If you like your rolls super sweet, drizzle with some extra caramel sauce. The result is a pan full of warm, gooey and delightful rolls that are perfect for a large family or to save leftovers to enjoy throughout the week.

Next time you slept in a little too late or your family wants something more than the daily norm for breakfast, try this scrumptious and tasty recipe.

Your family will love it and don’t be surprised if you get a request or two for this breakfast again.

Caramel Sticky Rolls

YIELD: Serves 9

INGREDIENTS:

Nonstick cooking spray

flour, for rolling pastry

1 frozen puff pastry, thawed

caramel sauce, divided

1/2 cup walnuts, chopped

powdered sugar

DIRECTIONS:

Heat oven to 400 F. Spray muffin tin with nonstick cooking spray. Sprinkle flour on work surface. Flatten pastry sheet and roll into rectangle. Drizzle caramel sauce over pastry and spread within 1/2 inch of edges. Sprinkle chopped walnuts over caramel sauce. Starting on short end, evenly roll pastry with filling to other end. Cut pastry into nine pieces. Place pastries cut side up into muffin cups. Bake 22 minutes, or until golden brown. Immediately remove from pan to wire rack. Let cool 10 minutes. Drizzle with additional caramel sauce and dust with powdered sugar.

See video of recipe here.

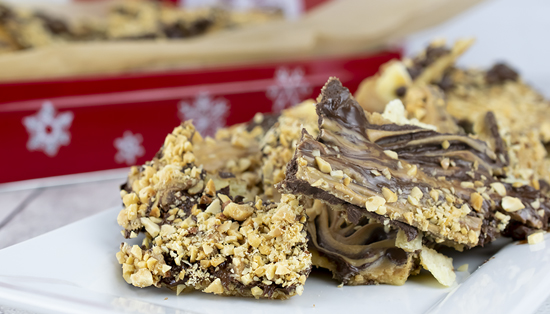
Peanut Butter Saltine Candy

Holiday Sweets Made to Share

(Family Features) Among the decorations, gifts and gatherings of loved ones, there’s perhaps nothing quite like family favorite foods that call to mind the joy of the holidays. Whether your loved ones relish building gingerbread houses or dining on an all-in feast, looking forward to annual traditions is part of what makes the season so special.

This year, you can add to the fun with a new annual activity by creating a delightful dessert with the help of little ones and adults alike. With an easy recipe like Peanut Butter Saltine Candy that calls for just a handful of ingredients, you can get the whole family involved in the kitchen.

Ask your little helpers to measure out ingredients while a grownup prepares the pan and uses the stove. Once the base is finished baking, call the kids back to sprinkle chocolate chips and peanut butter chips over the top.

After your candy creation is cooled, just break it into pieces meant to be shared with the entire family. An added benefit: all can enjoy the nutrient-rich flavor of peanuts, which rise to superfood status by delivering 19 vitamins and minerals and 7 grams of protein per serving.

Find more holiday recipes at gapeanuts.com.

Peanut Butter Saltine Candy

Yield: 45 pieces

Ingredients:

Nonstick cooking spray (butter flavor)

1 sleeve (4 ounces) regular saltine crackers

1/2 cup butter

3/4 cup creamy peanut butter

1 cup granulated sugar

2 cups milk chocolate chips

1/2 cup peanut butter chips

1/2 cup rough chopped, dry roasted peanuts

Directions:

Preheat oven to 400 F. Line 10-by-15-by-1-inch pan with aluminum foil. Spray foil with nonstick cooking spray then lay saltines flat in single layer on prepared pan. Set aside.

In heavy duty, 1-quart saucepan over medium heat, combine butter, peanut butter and sugar. Stir constantly until butter and sugar are melted, bringing mixture to boil. Boil 3 minutes, stirring frequently. Pour cooked mixture over saltines and bake 5 minutes.

Remove from oven and sprinkle chocolate chips over saltines. Let cool 3 minutes then spread melted chocolate completely over saltines.

Sprinkle peanut butter chips evenly over chocolate. Return pan to oven 1 minute to soften chips. Pull pointed tines of fork through softened peanut butter chips to partially cover chocolate. Sprinkle chopped peanuts on top, gently pressing into candy.

Let cool on rack about 15 minutes then place in freezer 3 minutes. Remove from freezer and break into pieces. Store in airtight container.

See video for recipe here.

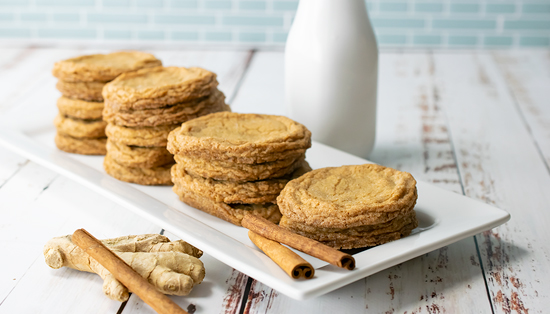
Ginger Cookies

Showstopping Cookies with a Crunch

(Culinary.net) Sweet treats are a favorite food, especially when they have a unique or unusual twist that makes them stand out from the crowd. When a dessert isn’t the classic chocolate or vanilla flavor, it can pique eaters’ interest. Cupcakes, macaroons and even pies have some intense flavors, however, it’s hard to top the delightful taste of these Fresh Ginger Cookies.

They are sweet and sugary with the perfect amount of ginger. Baked until golden brown, this dessert is a showstopper for family events and celebrations alike. Even the little ones will love to munch on this sweet treat with fresh, appealing flavor.

From parties to picnics, these cookies can be a hit. They are simple to make, don’t take much time to bake and are unique enough to bring along to nearly any occasion. With ground and fresh ginger, these cookies are equally as appetizing as they are satisfying and sure to turn heads in the kitchen.

Fresh Ginger Cookies

Yield: Serves 24

Ingredients: 

2  cups flour

1 1/2 teaspoons baking soda

1 1/2 teaspoons ground ginger

1 teaspoon ground cinnamon

1/8 teaspoon salt

3/4 cup salted butter, softened

1 cup, plus 3 tablespoons, sugar, divided

1/4 cup brown sugar

1 egg

1/4 cup grated fresh ginger

Directions:

Heat oven to 350 F. In medium bowl, whisk flour, baking soda, ground ginger, cinnamon and salt. Set aside. In stand mixer, beat butter, 1 cup sugar and brown sugar until fluffy. Add egg and fresh ginger; beat until combined. Gradually add dry ingredients to mixer until combined. In small bowl, add remaining sugar. Using spoon, portion out dough, roll into balls then roll in sugar. Arrange balls on baking sheet at least 1 inch apart. Bake 14 minutes, or until edges are golden brown. Transfer cookies to cooling rack and cool completely

See video here.

Find more sweet treat recipes at Culinary.net.

If you made this recipe at home, use #MyCulinaryConnection on your favorite social network to share your work.


by -
0 772
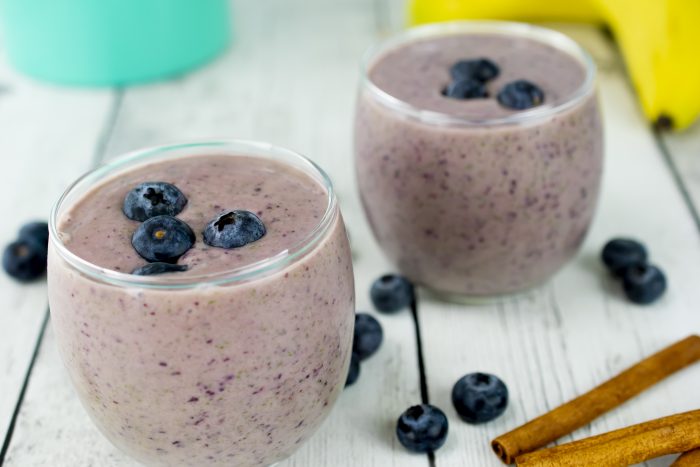
Blueberry Banana Smoothie

A Splendid Smoothie

(Culinary.net) If you ever find yourself craving something healthy and easy to make, you’re not alone. Maybe you are constantly on the go, chasing after little ones or just started a new job. Whether you’re on the move or relaxing at home, smoothies are a simple way to add nutritious ingredients to your diet.

From strawberries and mangos to blueberries and more, there are almost limitless smoothie options. You can use different combinations of greens and textures or even add something savory like peanut or almond butter.

This Blueberry Banana Smoothie is simple with just a couple basic directions and gives you the energy you need to finish out your day strong.

It has 1 cup of spinach, which is full of iron and vitamins, frozen bananas and blueberries to fill up your fruit intake for the day and berry yogurt to add a hint of dairy and some sweetness to your drink.

Garnish your finished product with fresh blueberries for some extra flair. With chia seeds for added texture, this smoothie is perfect for breakfast or even an afternoon snack.

Find more healthy recipes at Culinary.net.

If you made this recipe at home, use #MyCulinaryConnection on your favorite social network to share your work.

Blueberry Banana Smoothie

YIELD: Serves 2

INGREDIENTS:

1 cup spinach

1/2 cup water

2 tablespoons apple cider vinegar blend

1 tablespoon almond butter

1/2 cup bananas, frozen

1/2 cup blueberries, frozen

1 tablespoon chia seeds

1/4 teaspoon ground cinnamon

1/4 teaspoon minced ginger

1/2 cup berry yogurt

fresh blueberries, for garnish (optional)

DIRECTIONS:

In blender, blend spinach, water, apple cider vinegar, almond butter, frozen bananas, frozen blueberries, chia seeds, cinnamon, ginger and yogurt until smooth.

Pour into two glasses and garnish with fresh blueberries, if desired.

See video of recipe here.


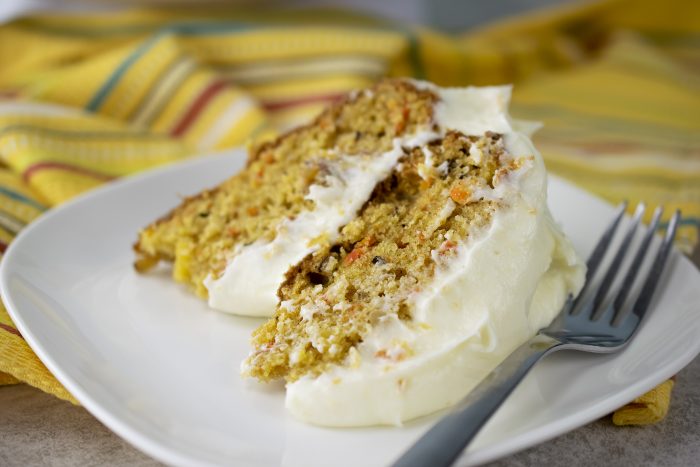
Serve a Sweet Treat

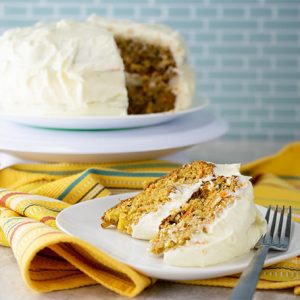
Surprise your family with a dessert fit for the season. This Carrot Cake recipe is a traditional take on the timeless treat and created using everyday ingredients. 

Find more dessert inspiration at Culinary.net.

Carrot Cake

Ingredients:

2 1/4 cups flour

1 teaspoon baking soda

1/2 teaspoon salt

1 teaspoon cinnamon

1/2 teaspoon baking powder

1 cup vegetable oil

1 1/4 cups sugar

3 eggs

1 1/2 cups carrots, shredded

1 cup crushed pineapple with juice

2/3 cup walnuts

Frosting:

2 packages (8 ounces each) cream cheese

3/4 cup butter, softened

1 teaspoon vanilla extract

5 1/2 cups powdered sugar

Directions:

Heat oven to 350 F.

In large bowl, sift flour, baking soda, salt, cinnamon and baking powder.

In mixing bowl, cream together oil and sugar. Add eggs one at a time. Gradually add in carrots and crushed pineapple.

Add dry mixture to wet ingredients and beat until smooth. Fold in walnuts.

Pour batter into two lightly greased 8-inch round cake pans and bake 25-30 minutes, or until knife inserted in center comes out clean. Allow cakes to cool completely. Remove cakes from pans and slice off tops to level cakes.

To make frosting: In mixing bowl, cream together cream cheese, butter and vanilla. Gradually add in powdered sugar and mix until smooth.

Spread two large spoonfuls frosting over top of one cake and stack second cake on top. Frost entire cake with remaining frosting.

See video here.

by -
0 1109
Dreamy Chocolate Mousse
A Memory-Making Mousse

Some of the best memories throughout life stick with you forever as you play them over and over in your head and smile, thinking fondly of those times.

A lot of these good memories are centered around laughs, great conversation and irresistible, mouthwatering food. Family events such as wedding showers or Mother’s Day, or the first day of spring after a bitter winter, can be reasons to celebrate and indulge in something out of the ordinary.

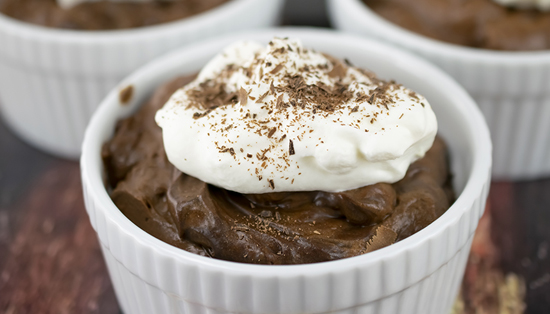
This Dreamy Chocolate Mousse can make those special memories just a little bit sweeter. It’s rich, decadent and full of scrumptious chocolate flavor. Topped with whipped cream and shaved chocolate, it’s the perfect addition to almost any special occasion.

It works as a dessert after a meal or just a special treat. It can be served at a big event or simply a Sunday afternoon at home.

Find more sweet treat recipes at Culinary.net.

Dreamy Chocolate Mousse

YIELD: Serves: 4 to 8

INGREDIENTS:

8 ounces bittersweet chocolate, chopped, plus chocolate shavings (optional)

40 large marshmallows

2 1/4 cups heavy cream, divided

DIRECTION:

In large bowl, combine chopped chocolate, marshmallows and 1/2 cup heavy cream. Microwave 2 minutes on high, or until marshmallows are melted. Let mixture cool 1 hour.

Using mixer, whip 1 3/4 cups heavy cream until soft peaks form. Reserve and refrigerate 1/2 cup whipped cream for topping.

In cooled chocolate mixture, fold in 2 cups whipped cream until combined. Add remaining whipped cream and mix until combined.

Spoon mousse into ramekins. Refrigerate at least 2 hours.

To serve, top with 1/2 cup reserved whipped cream and sprinkle with shaved chocolate, if desired.

See video of recipe here.