Tags Posts tagged with "Baking"

Baking

Bunny Butt Cake

(Culinary.net) Warmer days at the start of spring mean Easter is almost here, and the big bunny himself will be hopping around in no time delivering goodies.

This Easter, celebrate with your loved ones with a delicious and colorful Easter Bunny Butt Cake. It can bring smiles and laughter while putting everyone in a light, joyful mood.

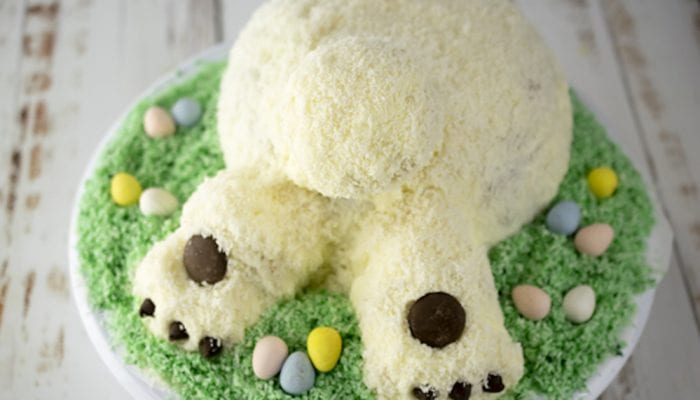
This cake is fun and bright with a fluffy, moist interior. Complete with chocolate candy eggs, shredded coconut and chocolate chips for little bunny toes, this recipe goes all out to paint a picture of the Easter bunny. This cake is worth every step. It’s delicious and as cute as can be, plus it’s perfect for dessert after a big Easter dinner.

Easter Bunny Butt Cake

Yield: Servings: 10-12

Ingredients

Nonstick cooking spray

2 eggs, plus 4 egg whites, at room temperature

3/4 cup cream of coconut

1/2 cup crushed pineapple, drained

2 teaspoons coconut extract

1 teaspoon vanilla extract

2 1/4 cups flour

1 cup sugar

2 teaspoons baking powder

1/2 teaspoon salt

12 tablespoons unsalted butter, at room temperature


Buttercream Frosting:

3  cups powdered sugar

2   sticks unsalted butter, softened

3   tablespoons milk

1   teaspoon vanilla extract

1/2  teaspoon coconut extract


4 thin pretzel sticks

1 bag (10 ounces) sweetened shredded coconut

8 drops green food coloring

2 large round chocolate candy melts

6 chocolate chips

mini candy-coated chocolate eggs, for garnish


Directions

Heat oven to 325 F.

Line muffin pan with four paper liners. Spray oven-safe glass bowl with nonstick cooking spray.

In large bowl, whisk eggs, egg whites, cream of coconut, pineapple, coconut extract and vanilla extract until combined.

In food processor, pulse flour, sugar, baking powder and salt until combined. Add 6 tablespoons butter. Pulse until combined. Add remaining butter. Pulse until coarse meal forms.

In large mixing bowl, add coarse flour butter meal. Add half of egg mixture. Beat 1-2 minutes. Add remaining egg mixture; beat until combined.

Fill each muffin cup 2/3 full. Bake 18-20 minutes, or until done. Cool completely.

Pour remaining batter into prepared oven-safe bowl. Bake 1 hour, 40 minutes, or until done. Cool completely.

To make buttercream frosting: In large bowl, add powdered sugar and butter; beat until fluffy. Add milk, vanilla extract and coconut extract; beat until creamy.

Turn bowl upside-down on cake stand until cake removes from bowl. If cake needs leveled, turn cake over and trim to flatten. Frost cake.

Remove wrappers from cupcakes. Using two pretzel sticks, press into base of cupcakes

and anchor to bottom rim of bowl cake to create bunny feet. Frost feet.

Take third cupcake and cut muffin top off. Cut muffin top in half. Using one pretzel stick, anchor one muffin top half at bottom of full cupcake to form toes. Repeat with second muffin top half for other foot. Frost toes.

Attach final cupcake with remaining pretzel stick to butt area of cake to make tail. Frost tail.

Apply 1 1/2 cups shredded coconut all over cake. Press chocolate candy melts into bottoms of bunny feet to resemble foot pads. Add chocolate chips to resemble pads for toes.

Place remaining coconut in plastic bag. Add green food coloring. Toss in bag until coconut is colored. Spread around base of cake for grass. Decorate grass with chocolate eggs.

Tips: Spoon flour into dry measuring cup and level off excess. Scooping directly from bag compacts flour, resulting in dry baked goods. Add 1 tablespoon additional milk if frosting is too stiff. Keep adding until desired consistency.

Glazed Lemon Loaf

By Heidi Sutton

Whether you’re enjoying a spring holiday like Easter or simply embracing the opportunities that the new air brings, food remains the centerpiece. And with citrus, each moment can be a celebration. If you love the smell and taste of lemons, then this Lemon Loaf is the perfect sweet bread to bake for Easter. Serve it up for breakfast, brunch, dessert or an afternoon treat.

Glazed Lemon Loaf

YIELD: Makes one loaf
INGREDIENTS:
Loaf
1/2 cup butter, room temperature
1 cup sugar
3 eggs, room temperature
1/2 tsp. vanilla extract
1 1/2 cups cake flour
1/4 tsp salt
1/4 tsp baking soda
1/2 cup sour cream
2 tbsp. fresh lemon juice
Zest from 2 lemons

Glaze
3/4 cup powdered sugar
1 tbsp. fresh lemon juice
Zest from 1 lemon

DIRECTIONS:
Preheat oven to 350 F and line your 8 x 4″ loaf pan with parchment paper. Cream butter and sugar together in a large bowl until light and fluffy. Add in your eggs one at a time and vanilla extract. Into a smaller bowl mix together your flour, salt and baking soda. Alternately add the dry ingredients and your sour cream to the batter, starting and ending with the dry ingredients. Beat between each addition until just combined. Fold in fresh lemon juice and zest and mix until well combined.

Pour batter into the prepared loaf pan. Bake in oven about 50-55 minutes or until a toothpick inserted into the center comes out clean. Meanwhile, prepare glaze by mixing powdered sugar, lemon juice and lemon zest together until smooth. Remove loaf from oven and let cool completely (about one hour) before topping with lemon glaze.

Find more citrus recipes at Sunkist.com/Recipes.

METRO photo

Gingerbread cookies and houses are one of the many symbols of the holiday season, alongside Christmas trees and twinkling lights. In fact, few confections symbolize the holidays more so than gingerbread. Many a child (or a child at heart) has spent hours carefully trying to create decorative gingerbread houses.

Although gingerbread recipes span various cultures, gingerbread houses originated in 16th century Germany. The fairy tale “Hansel and Gretel” helped solidify the popularity of gingerbread, which became part of Christmas traditions.

Even though gingerbread houses can be fun to make, there’s no denying it can be exacting work — especially for those who strive for perfection. Prepackaged kits attempt to take some of the guesswork out of the equation, but those who are crafting from scratch can employ these tips as they build their gingerbread houses.

• Go for form and not flavor. Few gingerbread houses ever get eaten, so focus on finding a dough that will bake up rock hard as opposed to one that tastes good.

• Get the right icing texture. Pastry artist Catherine Beddall says royal icing is the preferred “glue” to adhere gingerbread pieces. Beddall says icing should be thick like peanut butter and not runny.

• Mind the dough. Do not roll out the gingerbread dough too thin or it may become brittle after being cooked. Always cut out shapes before the gingerbread is baked. Let the baked pieces sit overnight to cool completely before using them to build.

• Patience is key. Allow the icing to dry for at least a couple of hours after adhering each piece and before moving and handling the house, says Beddall. Work in stages so that individual items can be decorated and allowed to dry. Then the walls can be put together, followed by the roof pieces.

• Kids likely will need help. Children may not have the patience or steadiness to handle complete gingerbread construction. They can decorate the separate pieces of the house while the components are laying flat, which is easier for kids. Adults can do the main assembly later on.

• Utilize a template. Free-handing may not be easy. Cut out templates using cardboard or posterboard for various gingerbread pieces.

One of the most important tips is to have fun. Don’t take gingerbread house making too seriously as a novice. Rather, enjoy the experience and the centuries-old tradition.

By Barbara Beltrami

The winter holidays are a time of rewards. Toys for good little children. Electronic devices for good big children. Baubles and bangles and bicycles. Sweaters and scarves and sleds. (I don’t know…these days does Santa still leave coal for bad children?)

And of course, sweet indulgences for having endured the holiday hassle, the spartan salads and remarkable restraint of the past year’s daily fare, the life of lattes instead of lunch and denial instead of dessert.

From January to November with a few hops off the wagon in between, we all feel guilty about satisfying our sweet teeth (tooths?) But come December, it’s Wahoo! Bring on those cookies and candy canes and chocolate Santas. And hey! What’s for dessert?

Here are three of my favorite desserts for the holidays. They’re all festive enough for a holiday table and easy enough for a special family treat.

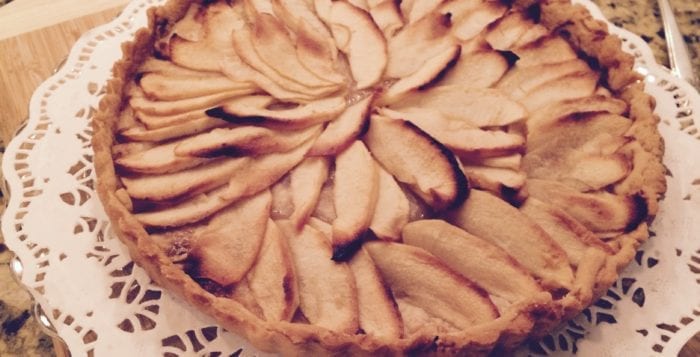
Apple Tartapple-tart

INGREDIENTS:

2 cups flour

1/2 teaspoon salt

2/3 cup solid vegetable shortening

2 teaspoons sugar

4 tablespoons ice water

3-4 Granny Smith apples, peeled, cored, and cut into thin crescent-shaped slices

1/4 – 1/3 cup granulated sugar

2 tablespoons butter, cut into small pieces

1/4 cup confectioners sugar (optional)

DIRECTIONS:

Preheat oven to 425 F. In an electric food processor, blend the flour, salt, vegetable shortening and sugar; pulse until the mixture resembles coarse meal. Add ice water and process again until mixture forms ball.

Remove, place between two sheets of waxed paper and roll out into large circle that will fit bottom and sides of a well-greased 8- or 9-inch spring form tart pan. Gently lift top paper away and invert crust over pan. Peel away bottom sheet. Spread and pat dough against bottom and sides of pan. With rolling pin, remove any irregular pieces from top edge of pan. (Don’t worry if you have to patch crust as the apple slices will cover it.)

Arrange apple slices in attractive circles to fill crust. Sprinkle with granulated sugar; dot with butter. Bake 30 to 40 minutes, until crust is golden and apples are tender. Set aside on rack to cool: Gently remove tart from pan by pushing bottom of pan up. It is best to avoid trying to remove tart from bottom, but go ahead if you are brave. Before serving, sift confectioners sugar over top, if desired.

Cheesecake with Raspberry Topping

INGREDIENTS:

For the crust:

2 cups graham cracker crumbs

1/2 cup granulated sugar

1/2 cup melted butter

For the filling: 

Two 8-ounce packages cream cheese, softened at room temperature

5 large eggs, at room temperature, separated

1 teaspoon vanilla extract

2 tablespoons freshly squeezed lemon juice

1 cup granulated sugar

1 pint sour cream

For the topping:

1 pint fresh raspberries, gently rinsed and thoroughly dried

1/2 cup currant jelly, melted

Fresh mint sprigs for garnish

DIRECTIONS:

In a medium bowl, thoroughly mix graham cracker crumbs with sugar, then with melted butter. Line sides and bottom of 9-inch spring form pan (with flat bottom insert in place) with crumb mixture.  Refrigerate for at least one hour.

Preheat oven to 350 F.  In large electric mixer bowl, with mixer at medium speed or “cream,” beat cream cheese, egg yolks, vanilla, lemon juice and sugar until smooth. Add sour cream and continue beating until well blended.

In clean mixer bowl, beat egg whites until stiff.  Fold into cheese mixture. Turn cheese mixture into crumb-lined pan.  Bake 1 hour, then turn off oven and let sit in oven 1 hour longer. (When cake comes out of oven and cools, it may sink.  Do not be alarmed! The berries will cover that.)

When cooled to room temperature, run knife blade around edge of pan to loosen crust. Be sure to keep blade pressed hard against inner rim. Unclasp side of pan and lift gently from bottom. Refrigerate until ready to serve or glaze.

Spread berries evenly around top of cake. With pastry brush, coat berries with melted jelly; let set. Refrigerate. When ready to serve, garnish with mint sprigs.

Profiteroles with Pistachio-Rum Ice Cream and Chocolate  Sauce

YIELD: Serves 8

INGREDIENTS:

1 cup water

1 stick butter

1 cup flour

4 eggs

1 pint pistachio ice cream, softened but not melted

1 cup chopped red and green candied fruit or fruit peel

3 tablespoons rum

8 ounces semi-sweet chocolate pieces

8 ounces heavy cream

DIRECTIONS:

For the profiteroles: Preheat oven to 400 F. Grease a baking sheet. In medium saucepan, heat water and butter to rolling boil. Over low heat, vigorously stir in flour until mixture forms a ball. Remove from heat and vigorously beat in eggs, one at a time until mixture is smooth. Drop the dough into 8 equidistant mounds onto baking sheet. With finger tips, pat mounds into symmetrical domes.  Bake 35 to 40 minutes, until puffed and golden brown.  Allow to cool. With a sharp knife, slice about 1 inch off  tops; reserve. Carefully and gently scoop out soft dough from center; discard.  Five or 10 minutes before serving, let ice cream mixture soften a little;  fill the puffs with it and top with reserved sliced-off tops.  Stack into a pyramid and drizzle with chocolate sauce.

For the filling: Fold one cup of the candied fruit and the rum into the ice cream.  Return to freezer.

For the sauce: In a small saucepan, heat cream and chocolate pieces together.  Mix with wire whisk over medium-low heat until it reaches the consistency of chocolate pudding. Remove from heat. Let stand till just warm or room temperature. Refrigerate.  Reheat in double boiler. Add more chocolate if sauce seems too thin. Let cool a little after reheating so it’s a little less runny.

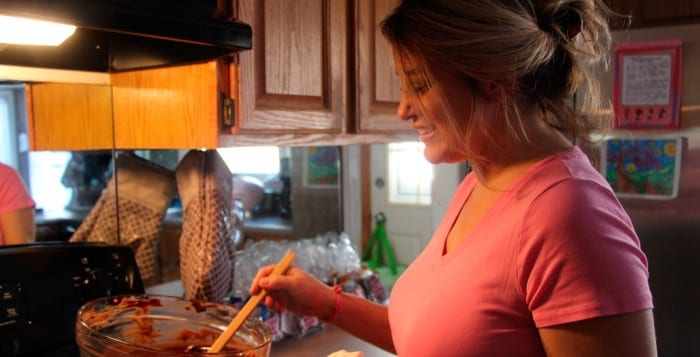
Mollie Adler bakes her brownies at her home in Shoreham. Photo by Giselle Barkley

Don’t look back. Keep going forward.

That’s what Mollie Adler’s father said to her before he died several decades ago. And she hasn’t looked back since — even as she is fighting to save her home with her new business “Miss Mollie’s Brownies.”

Around two years ago, this single mother of two hit hard times when her divorce not only left her struggling to put food on the table but also resulted in her Shoreham home going into foreclosure. Adler suffered another huge blow last September when she was laid off from her part-time job. With kids to feed and a home to worry about, baking brownies became Adler’s best bet.

Adler established her business after applying to New York’s Self-Employment Assistance Program last year. She was accepted into the program in October and started recycling water bottles to help pay for brownie ingredients. She’s currently selling her brownies at the Port Jefferson Winter Farmers Market.

“She’s always wanted to pursue a career in baking,” Denise Rohde said. “Her brownies honestly are her claim to fame. It’s almost like getting laid off was a blessing in disguise because it gave her time to actually pursue her dream.”

Rohde, of Baiting Hollow, met Adler nearly 17 years ago and has seen her through the many obstacles in her life — including the first time Adler was laid-off several years ago. After losing her second job, Adler decided to pursue her dream.

“I just had to reach and say this is what I’m going to do,” Adler said about creating Miss Mollie’s Brownies. “I’m going to do it for me. I’m going to have hours that make sense for me and I want to empower myself.”

“Miss Mollie’s Brownies” are packaged and arranged at her home. Photo by Giselle Barkley

But a chronic health condition further complicated Adler’s life when she started losing her sense of smell and taste. While she can taste salty or sweet foods, she can’t taste flavors, and has no sense of smell. Regardless, her fudgy brownies have friends, family members and clients coming back for more.

While her business is only a few weeks old, Adler has a wide range of brownie flavors including classic, espresso and nutty. Some seasonal flavors include apple pie, s’mores, mint and lavender, which she’s perfected with the help of her children who taste-test the brownies. But their help doesn’t stop there.

Adler’s daughter Melanie, who doesn’t share her mother’s last name, was the first to tell her mom’s story. Now, with the help of Adler’s graphic designer Gary Goldstein, Adler’s clients can read her story on the tag tied to each of her brownies. Goldstein met Adler more than a year ago. Goldstein, an art teacher who is designing Adler’s labels for free, started working with her last November. In that time, he’s seen her tenacity as she works to save her home.

“She deserves this,” he said. “She deserves not only things going well for her, but to be successful because she’s a dedicated mom and she’s hard-working. Like everyone else in life, you have your ups and downs, but this is a woman I envision being successful.”

In 2014, according to www.singlemotherguide.com, nearly 12 million families in America were single-parent families. According to Port Jefferson resident Pat Darling, a friend of Adler, some single parents don’t always pick themselves up when they hit hard times.

“I think when a person is down, instead of staying there they should reach, and they should dream — and she’s reaching for her dreams,’ Darling said. “I hope they all come true.”

Adler doesn’t just want her dreams to come true. She also wants to show her kids and single parents alike what dedication and perseverance can achieve. She said she hopes to create a place for single parents to help them through their hardships once her business takes off.

“Everyday I get up and do whatever it takes to get this done,” Adler said about building her business. “I’m not going to stop until “Miss Mollie’s Brownies” is a household name.”