Tags Posts tagged with "Ellen Barcel"

Ellen Barcel

by -
0 1756
Fig trees grown in containers should be moved to a cool dry place to overwinter. Photo by Ellen Barcel

By Ellen Barcel

It’s only the middle of September and yet I see leaves beginning to turn colors — yes, already. Now is the time to start thinking about your annual autumn gardening chores.

1. This time of year, with its cool weather is ideal for transplanting and/or dividing herbaceous perennials. They will easily have two or three months to settle in and grow even more roots before a hard freeze.

2. This is also a great time to assess your garden, its successes and its failures. Yes, we all have them — plants that didn’t do as well as we had hoped. So, look at your plants. What do you want to move? What do you want to take out? What do you want to replace?

3. Autumn is a great time to put in new plantings. Roots continue to grow underground well into December or until there is a hard freeze. Because autumn is usually cooler, you won’t spend as much time watering in the new plantings. There’s a saying that it takes three years for a new or transplanted plant to really succeed: The first year it gets used to its new home, the second year it grows roots and really settles in and the third year it thrives. If you plant this autumn, you’ve got a jump start on the process.

Forsythia bloom in early spring — don’t prune them in autumn or you will have cut off the flowers. Photo by Ellen Barcel

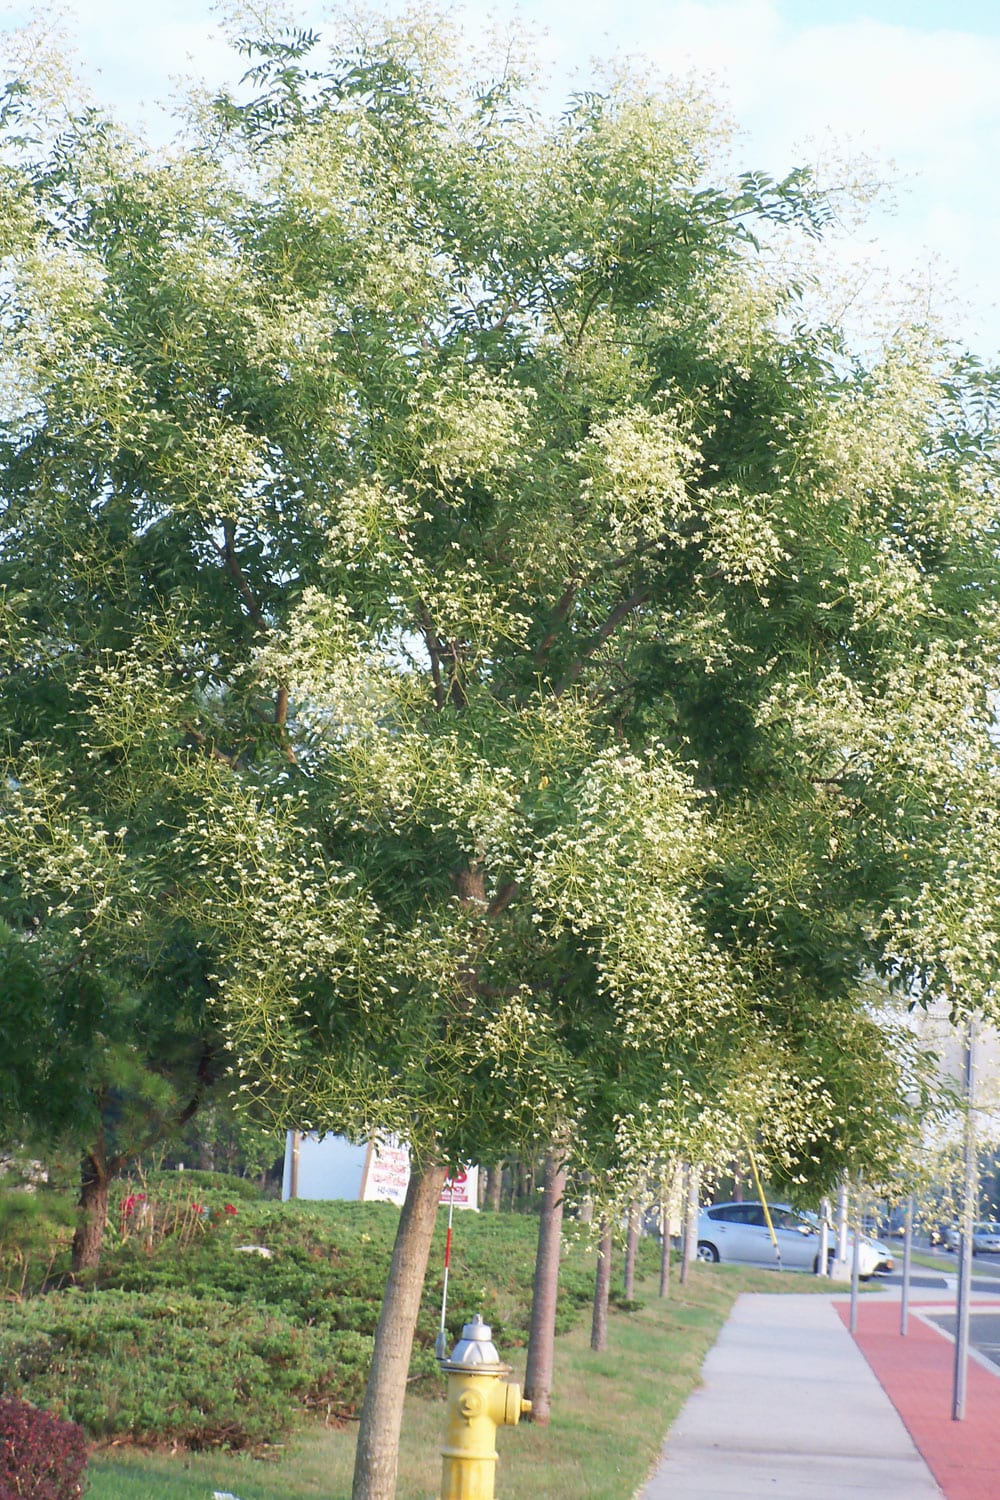
4. Autumn is also a good time to have any large trees on your property checked out by an arborist if you haven’t done so already. Hopefully we won’t be in the path of any hurricanes as we have in the last few years. But, even smaller storms, like the one that hit the North Shore in early August, can damage weakened or dead tree branches. And no, topping trees to keep them smaller is not recommended as it weakens the tree in general.

5. Don’t cut back hardy ornamental grasses if you can avoid it. They look beautiful all winter, especially if covered with snow or ice. If they do need to be cut back, do it in spring when they’ll be ready to start growing again.

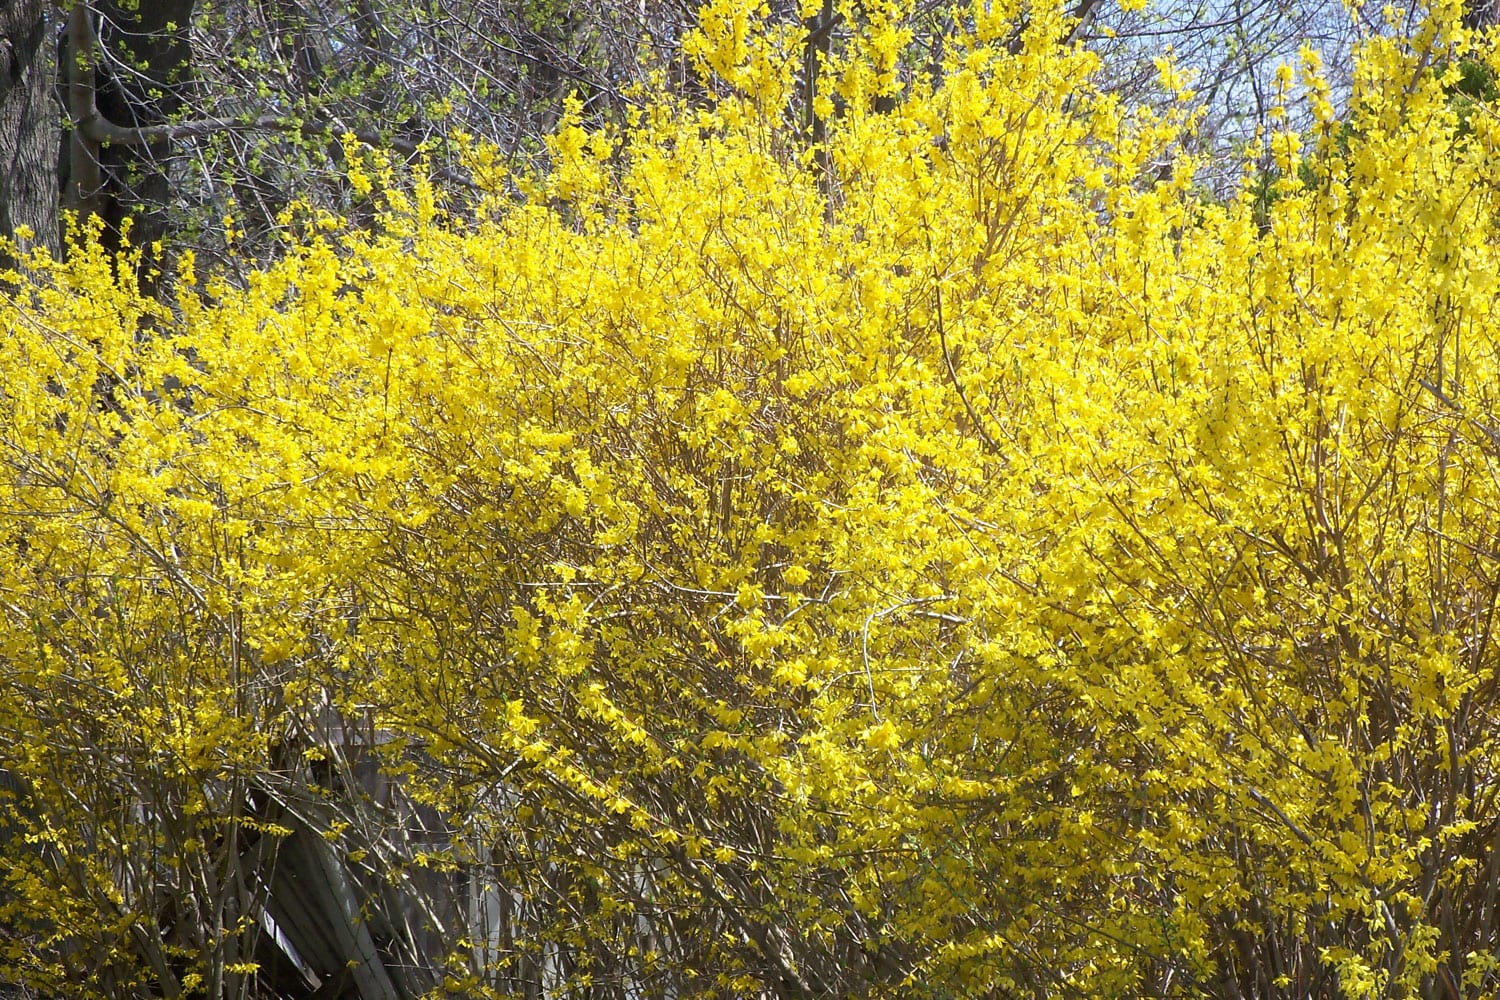
6. Don’t prune early spring flowering plants like forsythia in the fall. You’ll be cutting off next spring’s flowers.

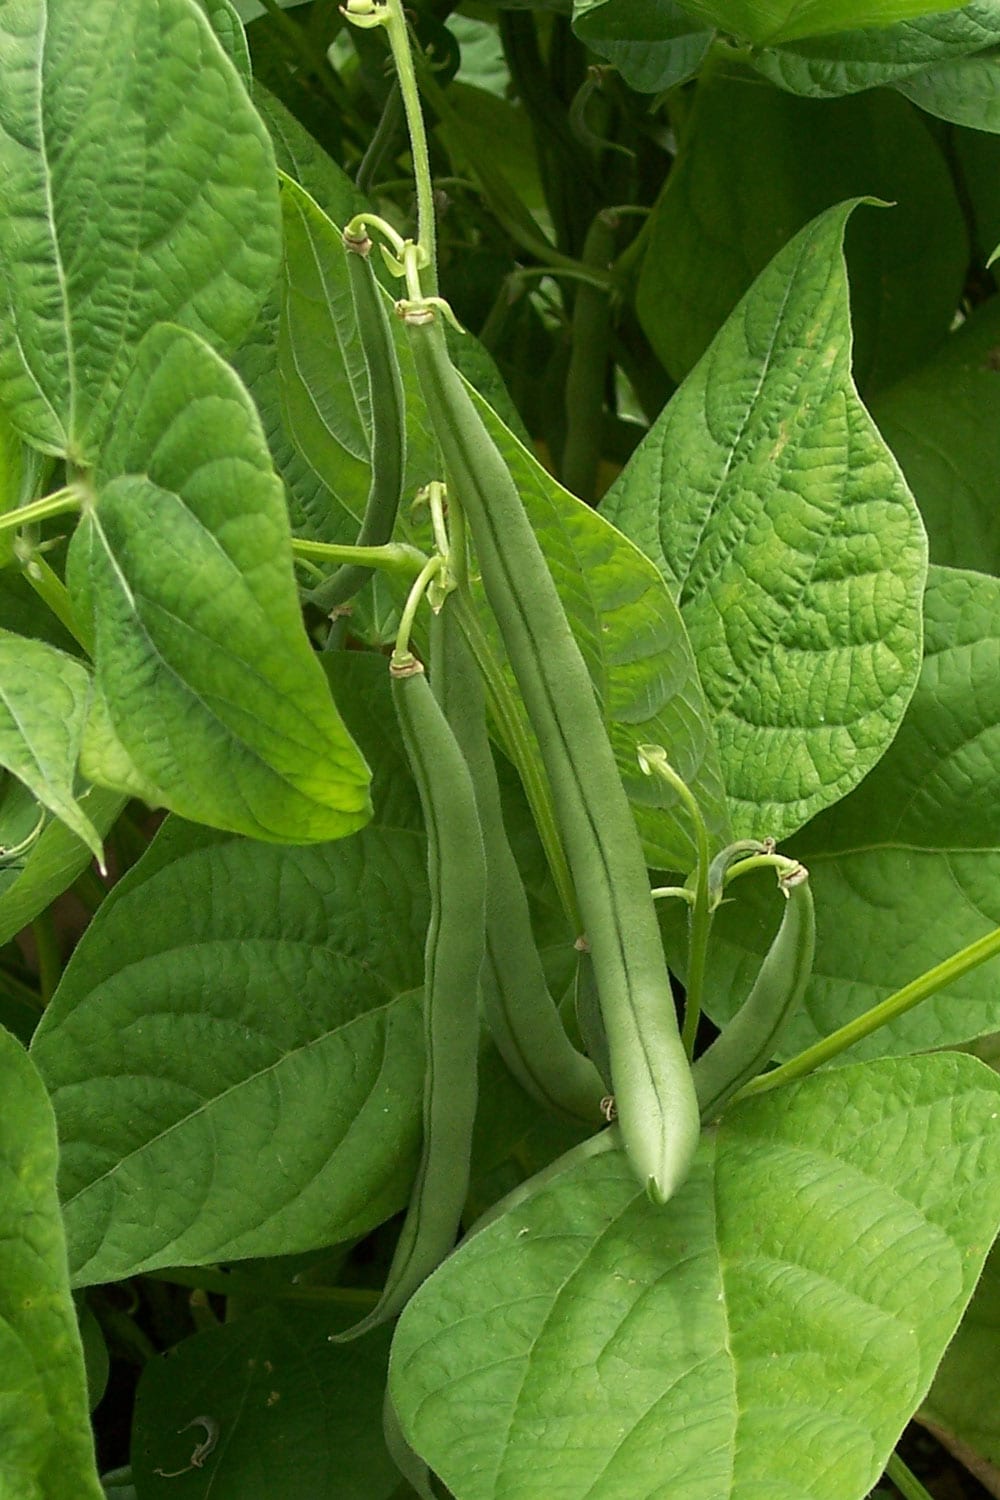
7. Leaving spent flower heads on your plants provides seeds for birds as the weather gets colder. If you really don’t like the way they look, go out during a mild late autumn or winter day and cut them back when the seeds are all eaten or have fallen to the ground. This is especially important for plants that reseed themselves if you want them to regrow next year.

8. If you have a holly bush that needs to be pruned, wait until December. Then you can use the prunings as holiday decorations.

9.  Stop adding to your compost pile once it gets really cold. What you add will no longer decompose, especially if its freezing or below and could attract unwanted animals. Turn the pile over one last time.

10. If it’s a very dry autumn, make sure to water your shrubs to help them through the winter.

11. If you have plants that are borderline in the hardiness area, say hardy to zones 7 and above (Long Island is zone 7), mulch them well to help them through the winter.

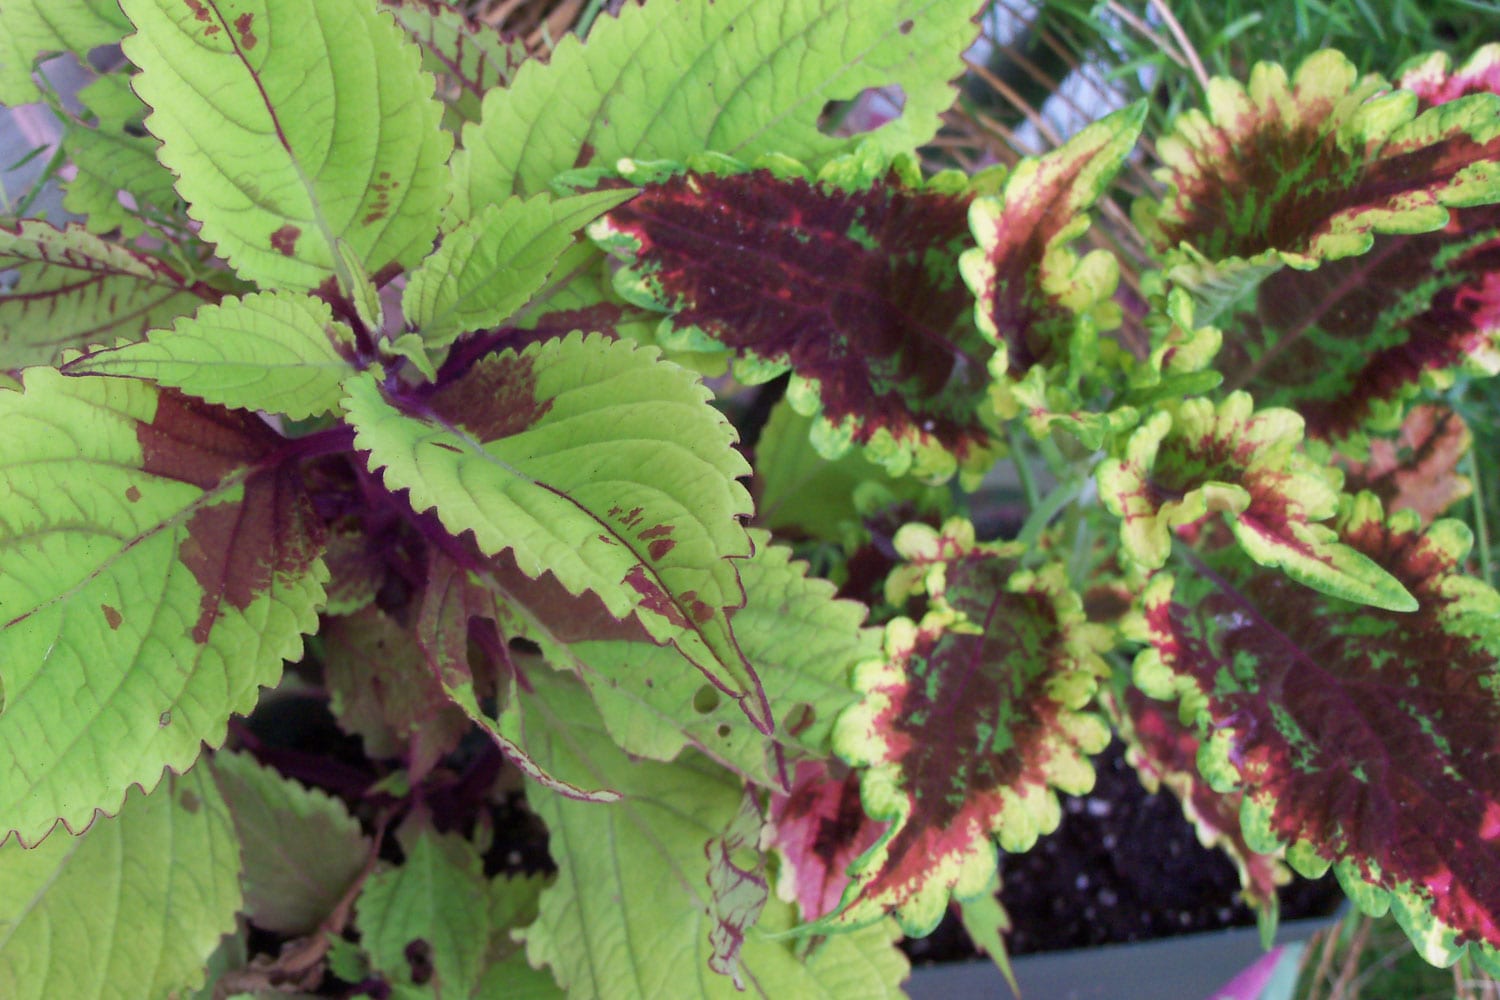
12. Lift any tender bulbs or corms and store them in a cool dry place to overwinter, replanting them in spring. Take cuttings of coleus and root them in water over winter. Bring in pots of herbs to grow on a sunny window sill.

13. Move any tender container plants (like fig trees) into a cool dry place (like an unheated garage) to overwinter. Remember to water them periodically, say once a month, since they would receive moisture from rain or snow if they were outside. If you can’t move fig trees, then they need to be wrapped up.

Ellen Barcel is a freelance writer and master gardener. Send your gardening questions to [email protected]. To reach Cornell Cooperative Extension and its Master Gardener program, call 631-727-7850.

by -
0 982

By Ellen Barcel

September is a wonderful time of the growing season. Your plants have matured and yes, your fruits, vegetables and herbs are ready to harvest and enjoy, not only now, but in the cold winter months ahead. There are a number of ways to preserve what you’ve nurtured all season long. Here are some ideas.

Canning
Canning (or putting up, as my grandmother used to say) involves cooking produce, storing it in sterile jars and sealing them so they are airtight. Grandma’s cupboard included “put up” green beans, corn and peaches, especially the white peaches from a tree in her backyard. The jars do not need refrigeration as long as they haven’t been opened.
If you are interested in canning, because of the longevity of the fruit and vegetables,one to five years, take a class first, as it is very important that the contents are preserved correctly and therefore safely. Cornell Cooperative Extension and other local organizations periodically hold such classes. Ball’s “Complete Book of Home Preserving,” edited by Judi Kingry and Lauren Devine, has 400 recipes with details on safely preserving your produce.
A reminder: Be very careful with any chemical products you use on produce for human consumption. My preference is to go completely organic, but if you do use chemicals, read the package directions for timing — how long before harvest can you use the product safely. And remember, label each package or jar with contents and date preserved.

jam-wSugar
Turning your fruits into jams and jellies is another great way of preserving your harvest. Jellies, jams and preserves can be made from most edible fruits. Jellies are clear and made from juice, while jams and preserves use the whole fruit. Marmalade adds the peels, which can add tartness in contrast to the sweet jelly that surrounds it.
Unusual jellies include mint; rose, made from the petals or hips; thyme; tea; lavender; peony; carnation and scented geranium. Many of the edible flowers can be made into syrups too, or turned into candies, such as violet candy.
There are countless recipes available. A really simple recipe uses fruit, such as strawberries, sugar, pectin and water. The resulting jam is stored in containers in the freezer. It lasts about a month in the refrigerator once defrosted.

Drying
One of the easiest ways of preserving is by drying. Herbs, for example, do very well this way. Harvest your herbs, making sure they are clean with no insects. Remove any dead leaves. Tie each bunch of herbs bouquet-style and hang them upside down in a cool, dry place. You can then remove and use the leaves as needed or remove all the leaves and store in a plastic bag or storage container. Herbs are not the only plants that can be dried. Virtually all fruits and vegetables can be too. There are various methods ,including drying in the sun, drying in the oven or drying in a dehydrator. Generally, these are rehydrated before use, but not necessarily. Dried apple chips are crunched on as is or can be added to salads. Dried sunflower seeds, salted or plain, don’t need rehydration either. Raisins can be rehydrated with water or your favorite alcoholic beverage (for adults only), like rum or brandy. Use them in rice pudding or homemade ice cream.
Dried string beans, onions and carrots can be used in soups and stews. The University of Georgia Cooperative Extensive has a 12-page pamphlet on drying fruits and vegetables that can be downloaded from their website (www.nchfp.uga.edu/publications/uga/uga_dry_fruit.pdf). It gives detailed information including how much water is needed to rehydrate each, how long each needs to be dried in a dehydrator and much more.
One of the benefits of drying is that you don’t need special equipment (like a large freezer) to store the produce — just package in an airtight container and store on a shelf in a cool, dry place.

Oil
If you know that you’re going to be using certain herbs in salads, carefully wash and dry the leaves, removing any brown leaves and stems. Store the leaves in a container — I prefer glass — covered with salad oil of your preference. When ready to use the herbs in a salad, take out the required amount, dice and toss into either the salad itself or your salad dressing.

Freezing
If you have a large freezer, freezing is another easy way to keep your fruits fresh and tasty for winter. Take berries, strawberries, blueberries, raspberries, etc., wash them gently and remove any stems. Let them sit on paper towels or clean dishcloths until dry. Then spread them out on a cookie sheet. Put the cookie sheet in the freezer for a few hours. When the berries are completely frozen, transfer them to a freezer bag or plastic storage container and keep in the freezer until ready to use. This is also an easy way to preserve herb leaves. Remove the leaves from the stem, spread out on a cookie sheet and freeze.
Herbs can also be frozen using ice cube trays. Mince the herbs and fill each cube until it is almost full. Cover with water and move to the freezer. When the herb ice cubes are frozen, transfer them to a freezer bag or plastic storage container and keep frozen until ready to use. Using ice cube trays gives you portion control and makes it easy to take out just what you need. This method is particularly useful for herbs to be added to soups and stews, or mint to be added to iced tea.
When freezing vegetables, it’s best to blanch — dip in boiling water — them first to stop the ripening process, submerge them in cold water and freeze as quickly as possible.

pickles-wPickling
Pickling is a very old method of preserving vegetables and yes, even fruits can be pickled. While cucumbers are the most common, onions, peppers, green beans and even watermelon (the white part) can be pickled for future use. I particularly like horseradish pickles, that is, cucumbers with horseradish included in the brine, and pickled beets; see below for my simple recipe. The principle behind pickling is that acidic vinegar prevents the growth of most bacteria.

Ellen Barcel is a freelance writer and master gardener.

by -
0 13414
Coleus are grown for their brightly colored and beautifully patterned leaves. To keep them growing, don’t let them go to seed. Photo by Ellen Barcel

By Ellen Barcel

There are a number of plants, grown as either annuals or herbaceous perennials, that are admired and grown for their leaves, not their flowers. Hostas are one of these as are aromatic mints, but so are coleus.

Coleus really brighten up a shady place and bring lots of color into the garden all summer long. You’ll find a number of scientific names for the plant, since botanists today frequently reclassify a plant after studying its genetic makeup.

Coleus, however, is in the Lamiaceae family — the mint family. While many plants in that family are aromatic, mints, thyme, sage, etc., coleus isn’t. But coleus does have the characteristic square stems of mints.

There are a number of ways you can grow your coleus: in a bed of plants outside, very nice scattered among hostas or other leafy plants; in a container outside or even as a houseplant.

Coleus are native to Southeast Asia and Malaysia. They are flowering plants. However, once the plant flowers and goes to seed, it has reached its life span and dies. So this is crucial: nip or pinch off the flowers in the bud if you want to keep your coleus growing and producing gorgeous, brightly pattered leaves.

Coleus are grown for their brightly colored and beautifully patterned leaves. To keep them growing, don’t let them go to seed. Photo by Ellen Barcel

Coleus can be propagated by seed —start indoors 8 to 10 weeks before the frost- free date — or by stem cuttings, rooted in water. If you choose to let the professionals start your coleus, like tomato plants, they can’t be put outdoors until it is warm enough, usually mid-May or, as my father always said, Memorial Day, just in case there’s an unusual dip in temperature. Because they are not cold-tolerant, they are considered annuals if grown outdoors on Long Island, but are evergreen perennials in warmer areas lasting for a number of years.

It shouldn’t surprise you, that being native to a warm climate, they are somewhat heat-tolerant, but that doesn’t mean drought-tolerant. Don’t let the soil get soggy, but do keep it evenly moist. If the soil dries out, the leaves will quickly wilt, but if you notice and water them fast enough, they may perk up.

Coleus leaves come in a wide variety of colors including green, yellow, white, burgundy, red, pink and black — actually a very dark burgundy. The green, of course, comes from chlorophyll, but the reds come from the chemical anthocyanin, an adaptation to attract pollinators to the plant.

Coleus can get quite large, but there are dwarf varieties. Check out the ones you’re interested in before purchasing them. They do best in a soil pH of 6.0 to 7.0, so you may need to add lime to your garden soil. Potting soil is closer to neutral, already.

As houseplants, keep in a warm place — 70 to 85 degrees is ideal, but not less than 50 degrees — with bright light.

As far as fertilizer goes, use compost, or if using chemical fertilizers, use once a month or as per package directions. If you’re growing your coleus in containers, you’ve probably used potting soil of one variety or another. Check it to see if it already contains fertilizer. If so, only start fertilizing when what’s in the soil is used up, which will be noted on the potting soil package.

As the cold weather approaches, you can bring containers inside to grow as houseplants or you can take cuttings from your favorite patterned/colored plants and root them in water over the winter.

Ellen Barcel is a freelance writer and master gardener. Send your gardening questions to [email protected]. To reach Cornell Cooperative Extension and its Master Gardener program, call 631-727-7850.

by -
0 9257
A mimosa tree in bloom. The flowers will soon be followed by seed pods. Photo by Ellen Barcel

By Ellen Barcel

Last week’s article focused on a late summer flowering tree, Styphnolobium japonica, the Japanese pagoda, which is a member of the pea family. Another tree that blooms in mid-August is the mimosa (Albizia julibrissin), which has fragrant pink (some varieties are orange) fluffy flowers. Mimosas are also in the pea family, but the flowers are very different from the Japanese pagoda tree.

The problem with this tree is that it is very prone to a fungal disease. Somewhere in the 1960s or ’70s many gardeners planted the quick growing and beautiful tree. Then the disease struck, killing thousands of trees on Long Island.

The flower of the mimosa tree. Stock photo

The mimosa, also known as the silk tree, is prone to the fusarium wilt. It is spread by contaminated soil, the pathogen being taken up by the tree roots, which means that if you have a mimosa that died as a result of this disease, don’t plant another one in the same area. I lost three massive mimosas to this disease way back when. This is a reseeder, so many new little trees would sprout, but then in a few years die. So I began pulling out the seedlings before they became established.

Bartlett Tree Research Laboratories notes that once a tree is infected there is no cure. When removing a dead mimosa, do not chip the wood and use it as a mulch because you would then be spreading the disease. There are several disease-resistant (not immune) cultivars, ‘Charlotte’ and ‘Tryon.’

In  addition to the sweetly scented flowers, the tree produces a light shade, even as a mature specimen, so it is a great tree to add to your garden. Just remember to get one of the disease-resistant cultivars.

Ellen Barcel is a freelance writer and master gardener. Send your gardening questions to [email protected] reach Cornell Cooperative Extension and its Master Gardener program, call 631-727-7850.

Latest William Sidney Mount exhibit features 19th-century children at work and play

‘Walking Out,’ 1854, by William Sidney Mount

By Ellen Barcel

Today, youngsters all seem to be tied to websites, texting, apps and more. They’ve got their headphones on and download the latest music. Until recently, children had to make do without electricity. They played games (nonelectronic), enjoyed music (which people had to make themselves) and danced. School didn’t feature “smart” classrooms.

‘Returning from the Orchard,’ 1862 by William Sidney Mount

While children today have chores, in the agrarian past children’s jobs were very different: They gathered eggs from their chickens, went fishing and trapping and helped hang the laundry out on the clothesline. Gender conventions were stronger then. Girls played with dolls and boys with trains.

To provide a glimpse into early 19th-century children’s lives on Long Island, the Long Island Museum of American Art, History and Carriages in Stony Brook has opened a new exhibit, “Young Island,” showing a collection of William Sidney Mount’s paintings that depict children’s lives in the years before, during and just after the Civil War.

Mount was a 19th-century Setauket artist who is known for his paintings of everyday life. In an age before the camera, he also did portraits, many of children. “Catherine Adele Smith,” “Maria Winthrop Seabury,” “Young Girl” and “Tutie [Ruth Hawkins Mount]” are all examples of those many portraits, all part of the current exhibit.

Children teased and played around — yes, they were naughty then too, shown in “Mischievous Drop” and “Boys Wrangling,” and they had work to do. “Returning from the Orchard” shows a young girl who has gathered fruit, “Catching Rabbits” shows boys emptying a trap, and “Boy Hoeing Corn” shows a child working in the field.

The idea for the exhibit was Joshua Ruff’s, director of collections and interpretation. “The idea came from the fact that we often have a Mount exhibit, especially during the school year … We’ve never done an exhibit with children before so it seemed like a good fit,” said Julie Diamond, director of communications at the museum.

“It’s an easy theme to recognize for Mount … when you look through the several thousand drawings we own as well as the more than one hundred oil paintings, children play a significant role in both his genre and portraiture. Mount himself was surrounded by children in daily life, living under the same roof as both of his brothers’ large families. He had many nieces and nephews,” said Ruff.

“Children are featured in his work in a myriad of ways — representing innocence, a young nation’s optimism, political points etc. Since this was also a time that children worked extensively on the American/Long Island farm, there’s that element too. Mount is like a fair number of other American artists of the 19th century — Winslow Homer, Eastman Johnson and others — who are using children in both allegorical and realistic ways in their work. So it’s a great theme to explore, even in a fairly small exhibit such as this,” he added.

‘Walking Out,’ 1854, by William Sidney Mount

Selecting the works to be included in the exhibit was a challenge. “Choice of the work was not easy,” said Ruff. “There are literally dozens of excellent drawings and paintings that could have been included, but this is our smaller gallery, so space only allows 18 works,” especially since many of Mount’s paintings are large.

Ruff continued, “I wanted to choose a range of both drawings and paintings, so we have five of the former, 13 of the latter. In some cases, these are works that we have not had out in a while — ‘Boys Snowballing,’ ‘Walking Out,’ and a few more have not been on view for some time. In other cases, such as ‘Girl Sleeping’ and ‘Turning the Leaf’ — these are some of Mount’s best-known works, but are usually not interpreted this way. ‘Turning the Leaf’ is also supported in this exhibit by a lovely small preliminary study Mount did for that painting.”

One of the best known of Mount’s works is “Dance of the Haymakers,” which shows workers in a barn dancing to a fiddler’s music. Outside, a small boy beats time to the music on the side of the barn with sticks. A dog lays on the ground and farm tools are propped up against the side of the barn.

“We wanted to show ‘Dance,’ not only because it relates to the theme, but also because it is going out on national loan to the Detroit Institute of Arts next year. One of the most important aspects of this exhibit for us is that we will be able to use it very well with our educational programming,” said Ruff.

Diamond added that the LIM has programs for school groups, one geared for kindergarten through second grade and another for fourth through sixth grade. “Both use the Mount exhibit as the basis for learning,” about American history.

“Also, it is a very good little family show. In addition to the regular labels/text, there are also labels for families. We hope that it will give people a chance to think about a side of Mount that they may not have considered much before,” said Ruff.

While at the LIM, visit some of its other exhibits, including Hooked@LIM, an outdoor exhibit of yarn bombing, the herb garden, “Gilding the Coasts: the Art and Design of Long Island’s Great Estates” and “Beth Levine: The First Lady of Shoes.”

“Young Island” is scheduled to run through the end of the year. The LIM, a Smithsonian affiliate, is located in Stony Brook at 1200 Route 25A. It is open Thursday through Saturday, 10 a.m. to 5 p.m., and Sunday, noon to 5 p.m. For further information, call 631-751-0066 or visit www.longislandmuseum.org.

The flowers of a Japanese pagoda tree. Photo by Ellen Barcel

By Ellen Barcel

I love it when people send me photos of unknown plants. Sometimes I know right off what it is and can help them with added information. Sometimes it takes some research, but it’s always fun. Recently, a gardening friend sent me some photos of trees covered in fragrant white flowers in mid-August.

Trees flowering this late in the season are unusual. Most flowering trees bloom in spring, bringing a profusion of color to that season. Some are followed by edible fruit, others by seed pods. Some, especially those grown for their showy flowers, are sterile. So, what was this beautiful tree? The tree in question was a Japanese pagoda tree.

A Japanese pagoda tree in bloom along Route 112 in Coram. Photo by Ellen Barcel

This tree, also known as the Chinese scholar tree, is a native a China, grown in the United States as a specimen tree. Styphnolobium japonica (also known as Sophora japonica) is in the pea family, Fabaceae, but unlike others in the family, is not a nitrogen-fixing tree. It’s a deciduous tree, easily growing up to 60 or more feet tall. It does well in a wide range of soil pH conditions, ranging from 4.5 (extremely acidic) to 8, which is alkaline, so, ideal for Long Island’s acidic soil.

Colorado State Cooperative Extension Service notes that the tree is hardy in zones 4 to 8 (Long Island is zone 7) and prefers a sunny location. The rapidly growing tree tolerates city conditions (i.e., pollution), meaning that it will do well planted along roadsides. It tolerates heat and drought conditions, making it ideal for Long Island with its occasional drought conditions. They describe the flowers as 10- to 15-inch panicles of “creamy-white, pea-like flowers” that survive for about a month. The flowers are followed by pods that “resemble strings of beads,” similar to garden peas. The pods are filled with yellow seeds.

My friend noted how many bees (and other insects) were flying around the tree, visiting the fragrant flowers. The tree provides light shade when young, but a mature tree produces dense shade. Keep this in mind when selecting the tree. Are you looking for dappled shade or dense shade?

Other plants in the pea family include the golden chain tree (see my column of June 18, this year), clover, sweet peas, lupine, beans and, of course, edible garden peas.

Next week we’ll talk about another late summer flowering tree, the mimosa.

Ellen Barcel is a freelance writer and master gardener. Send your gardening questions to [email protected] reach Cornell Cooperative Extension and its Master Gardener program, call 631-727-7850.

by -
0 1029
Radishes only take 30 days to mature so you can easily plant them for at least another month. Stock photo

By Ellen Barcel

Just because we’re so far into summer, you don’t have to make the assumption that the season is over for growing vegetables. There are many you can plant by mid-August that will mature by Long Island’s earliest frost date — early November — unless you have a microclimate in your area that is much colder than the rest of the island. There are even veggies that you can start growing as late as mid-September.

The rule of thumb for fall planting is to look up the maturity date of the plants you wish to grow — 30 days, for example, for radishes. Then count backward. The last date you can plant radishes then would be the end of September or the very beginning of October. To be on the safe side, figure the middle of September, instead. Always check the package maturity date because different varieties can vary tremendously. Early varieties of beets can mature by 50 days while later varieties can take up to 80 days; early carrots 60 days while later ones up to 85.

Veggies that you can plant in mid-August include bush beans (early varieties mature in 45 days, late varieties in 65 days), early cabbage (60 days), cucumbers (60 days), mustard greens (40 days),  peas (60 days), spinach (40 days) and turnips (40 days). Early carrots (50 days), kohlrabi (45 to 60 days) and leaf lettuce (40 to 50 days).

Some varieties of beans will mature in just 45 days. Photo by Ellen Barcel

Remember that all of the above are averages. An unusually hot September may affect your veggies negatively. An unusually early frost may do the same thing. But, this is what farmers from way back have had to contend with.  You plant based on the averages but Mother Nature may have other plans.

The Year Without a Summer, 1816, was called that because there was frost in every one of the 12 months of the year. The eruption of Mount Tambora in Indonesia, spewing ash into the atmosphere and blocking the sun the year before, is credited with this phenomenon. But, we don’t need a drastic event to affect our garden. We gardeners know the damage to our plants caused by the cold and snow of the last two winters.

On the other hand, frost could be late. I remember a few years ago, putting out my Christmas wreath next to the geraniums, which were not only alive but still blooming.

So, go ahead and plant a late season vegetable garden and cross your fingers that Mother Nature cooperates to give you a bountiful fall harvest.

Ellen Barcel is a freelance writer and master gardener. To reach Cornell Cooperative Extension and its Master Gardener program, call 631-727-7850.

by -
0 5942
A sweet cherry tree at Kunz Nursery in Port Jefferson Station. Photo by Heidi Sutton

By Ellen Barcel

When I was a kid, I used to go with my father and aunt to gather wild cherries. Cherries can, of course, be used to make a number of edibles, but my aunt used the cherries to make a cherry cordial. Unfortunately, because I was a kid, I never got to taste it, but all the adults claimed it was quite good.

If you’re interested in growing cherries, autumn/early winter is the ideal time to start. Planting trees in the fall allows the roots to settle in and continue to grow even into December until there’s a hard freeze. It’s like you’re giving the tree a head start for next year.

Wild cherries

There are a number of cherry species that are commonly known as wild cherry. The one growing wild in this area is Prunus serotina,  a native of eastern North America. It grows as far north as Canada and south to central Florida and Texas. According to the U.S. Forest Service it’s the only cherry tree that grows under such a wide range of climate conditions. Most are more limited.

Other names for this tree include black cherry, wild black cherry and rum cherry. Interestingly, cherries are in the rose (Rosaceae) family, a family that includes apples, almonds, pears, peaches and a whole lot more.

Wild cherries are eaten by birds and small mammals. With their white spring flowers, the trees are frequently grown as specimen trees. Since the cherries are not very sweet, they are generally not eaten right off the tree. Instead, they are used for jellies, jams, cherry pie and even a chilled cherry soup.

Sweet cherries

What if you’re more interested in growing sweeter cherries, cherries that you can pop into your mouth and savor right in the garden?

Well, there are many varieties of cherry trees that produce sweet cherries. Perhaps the most well known is the Bing cherry (P. avium ‘Bing’), sweet and flavorful with a deep garnet to almost black color. The tree can reach a height of 30 to 35 feet. White spring flowers in April give way to cherries in June. The tree needs full sun and is adapted to most soil conditions. It does well in U.S. Department of Agriculture hardiness zones 5 to 9 (Long Island is 7). One of the disadvantages of this tree is that it requires another cherry tree for pollination. This can be almost any variety of cherry tree, but it does mean that space is taken up with two, not just one, tree.

Another sweet cherry, Lapins (P. avium ‘Lapins’) is self-fertile, so you don’t need another tree for pollination. It’s a smaller tree, another plus for Long Island gardens that don’t always have enormous amount of space for trees. It, too, does well in zones 5 to 9.

When you go shopping for cherry trees, make sure you check the hardiness zones and future height as well as whether the tree is self-fertile or requires a pollinator. A soil pH of anywhere from 5.5 to 8.0 is suitable, although 6.0 and up is more ideal. Always test your soil first and adjust the pH as needed.

Flowering cherries

Kwanzan flowering cherry (P. serrulata ‘Kwanzan’) is grown for its gorgeous spring flowers, not fruit. It does well in a wide variety of soil pH levels but does require sun to maximize flowers. Its limited life span, 15 to 25 years, may be seen as a negative.

Weeping cherry (P. subhirtella ‘Pendula Plena Rosea’) is another one grown for its shape and flowers not its fruit. It grows in zones 5 to 8  and is generally a small tree, 20 to 25 feet tall.

General information

Cherry trees grow in a wide range of soil pH levels, but this may vary depending on the variety of tree you select. If your soil is very acidic, then add lime to make it sweeter. Remember, once you start liming the soil, you must continue since in time, it will revert to what it tends to be naturally.

They all need a well-drained soil, ideal for Long Island since most of our soil is sandy and therefore drains well.

Ellen Barcel is a freelance writer and master gardener. To reach Cornell Cooperative Extension and its Master Gardener program, call 631-727-7850.

by -
0 80
Together with sun and sufficient rain, compost tea will help lilac plants bloom. Photo by Ellen Barcel

By Ellen Barcel

Last week, we took a look at compost in general, what it is and how it’s made and used. This week, we’ll take a look at compost tea.

Compost tea is rich in nutrients but will not change the structure of the soil as compost itself will. It brings nutrients to plants quickly, while compost itself is more slow-release with nutrients going into the soil more gradually. Plan to use your compost tea within a few hours after its made.

There are a number of ways to make compost tea, some requiring a variety of equipment. The easiest way is to take a large bucket and fill it with mature compost. Add an equal amount of water and let it steep for a few hours to overnight. Take cheesecloth or burlap and strain the liquid out of the bucket. The liquid can be applied to the soil or used to foliar feed. It is taken up quickly by the plants’ roots. Some people take the compost and put it in a burlap sack and suspend it in a bucket or barrel of water to avoid the straining step.

Some gardeners feel that compost tea needs to ferment and therefore will add molasses to the liquid. The University of Vermont Extension, however, notes that its recommendation is to avoid adding simple sugars like molasses to the mix. It also notes that if the compost tea is made with additives but not tested for safety, then food crops may not be harvested “until 90 to 120 days after the compost tea has been applied.” This is the same recommendation for raw (not composted) manure being added to the garden.

How exactly you go about making the compost tea is up to you, but taking this extra step, while time consuming, gets nutrients into your plants quickly and makes for healthy plants. Healthy plants are more disease and pest resistant. Compost tea can be sprayed on your lawn as well as used for perennials, annuals, shrubs etc.

Remember, a benefit of compost and compost tea that you make yourself is that you control exactly what goes into it. You can totally avoid pesticides and chemical fertilizers if you want. Also, remember to avoid adding diseased plant matter to the compost pile.

If you are interested in making compost tea, there are two excellent, detailed articles from the University of Vermont (www.uvm.edu/vtvegandberry/factsheets/composttea.html) and the University of Illinois (https://web.extension.illinois.edu/homecompost/materials.cfm). Cornell Cooperative Extension also has an excellent online brochure on composting in general (https://cwmi.css.cornell.edu/compostbrochure.pdf).

Ellen Barcel is a freelance writer and master gardener. To reach Cornell Cooperative Extension and its Master Gardener program, call 631-727-7850.

by -
0 1214
Hydrangea macrophylla. Photo by Ellen Barcel

By Ellen Barcel

In many of my previous columns, I’ve talked about the benefits of using compost and compost tea on your plants. Let’s start with some basic information on what compost is and how to make it.

Compost is decayed organic matter. It’s full of nutrients and makes a great fertilizer for plants. Compost aerates clay soil and helps to hold moisture in sandy soil, so it improves soil structure. Making your own compost keeps waste out of the land fill. It also ensures that you can keep pesticides and other chemicals out of the compost and therefore out of your soil.

There are two types of compost piles, hot and cold. The hot pile raises the temperature of the ingredients to at least 135 degrees. There are several benefits of a hot compost pile. One is that many damaging organisms, like plant bacteria, are killed in a hot pile. Another is that the hot pile decomposes more quickly. Add equal parts green and brown matter, grass clippings and dry leaves, for example, all finely chopped and mixed together. Smaller pieces will decompose more quickly than larger ones. Add some manure in the ratio of 1/3 to 2/3 plant matter for a hot pile or add some blood and bone fertilizer.

A cold compost pile takes longer to decompose, but you need to be less concerned with ratios, manure, etc. Never put diseased leaves in a cold pile. You’re just saving the disease organisms for the next season. Actually, I never put diseased plant parts in any compost pile, just to be on the safe side. Make sure that you keep the compost pile moist or the plant matter will not decompose. Think about the Egyptian mummies, in the desert for thousands of years, yet not decomposed. Periodically turn the pile over. If you use one of the rotating composters on a stand, this step is very easy.

What goes in the compost pile? Any healthy green plant matter, but not woody as it takes too long to decompose, and lawn clippings; coffee grounds and used tea bags; paper towels; and kitchen peelings including apple cores, orange peels, etc. — keep a closed container in the kitchen to collect them and then periodically bring them out to the garden — crushed eggshells and manure from herbivores, such as cows and horses.

Do not add protein, such as leftover meat, which draws critters and is slow to decompose; fatty substances; manure from carnivores, such as dogs and cats, as it can transmit disease; and diseased plant parts.

Compost can be applied as a top dressing or lightly dug into the soil, being careful to avoid surface roots of plants. It can also be mixed into the soil when you transplant or add a new plant to the garden.

If you choose not to make your own compost, but acquire it from other sources, remember that you don’t know what has been used to make that compost. It may be exactly as you would make yourself or not. If you are keeping a strictly organic garden, this can be a problem. For example, whoever made the compost may have used insecticides on the plant matter or weed killers. I used to get compost from a local free source only to find pieces of broken glass in it along with pieces of wire. So, always wear your gardening gloves to protect your hands.

Next week, making compost tea.

Ellen Barcel is a freelance writer and master gardener. To reach Cornell Cooperative Extension and its Master Gardener program, call 631-727-7850.