Tags Posts tagged with "dessert"

dessert

Apple Coffee Cake

By Heidi Sutton

Last week’s recipes were two variations of apple pie; this week are two apple cakes. Both made with vegetable oil instead of butter, they are a perfect way to celebrate a sweet and fruitful New Year for Rosh Hashanah.

Apple Cake

YIELD: Makes 8 servings

INGREDIENTS:

3 cups crisp apples, peeled, cored and diced

3 teaspoons cinnamon

6 tablespoons, plus 2 cups, sugar, divided

3 cups flour

3 teaspoons baking powder

1 teaspoon salt

1 cup vegetable oil

4 eggs, beaten

1/4 cup orange juice

1 teaspoon vanilla

icing (optional)

DIRECTIONS: 

Heat oven to 350 F. In medium bowl, mix apples, cinnamon and 5 tablespoons sugar until combined. Set aside.

In large bowl, mix flour, 2 cups sugar, baking powder and salt until combined. Form well in middle of mixture. Add oil, eggs, orange juice and vanilla; mix until blended.

 In springform pan, pour half of batter. Add apple mixture. Pour remaining batter over apple mixture. Sprinkle remaining sugar over batter. Bake 40-50 minutes, or until top is golden brown and tester comes out clean and dry. Drizzle with icing, if desired.
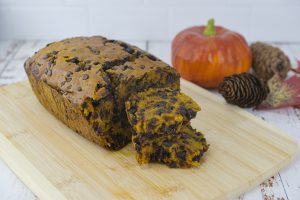
Apple Coffee Cake

YIELD: Makes 10 servings

INGREDIENTS:

5 cups tart apples, cored, peeled and chopped

1 cup sugar

1 cup dark raisins

1/4 cup vegetable oil

2 teaspoons vanilla

1 egg, beaten

2 1/2 cups sifted all-purpose flour

1 1/2 teaspoons baking soda

2 teaspoons ground cinnamon

Preheat oven to 350 F. Lightly oil 13-by-9-by-2-inch pan.

DIRECTIONS: 

In large mixing bowl, combine apples with sugar and raisins; mix well. Let stand 30 minutes. Stir in oil, vanilla and egg.

Sift together flour, baking soda and cinnamon. Using about 1/3 of mix at a time, add to apple mixture, stirring just enough to moisten dry ingredients. Turn batter into pan. Bake 35-40 minutes until toothpick inserted in center of cake comes out clean. Cool cake slightly before serving.

On the web:

Check out a recipe for Crown Raisin Challah at www.tbrnewsmedia.com

Lemon Crème Brûlée

By Heidi Sutton

What’s more delicious than crème brûlée? Two crème brûlées! With a rich and creamy custard filling topped with a hard sugary crust, these individual-sized decadent desserts, also known as burnt cream or Trinity crème, can provide a perfect ending to nearly any get-together. In honor of National Crème Brûlée Day on July 27, try these recipes courtesy of Culinary.net.

Vanilla Crème Brûlée 

YIELD: Makes 6 servings

INGREDIENTS:

4 cups heavy cream

2 teaspoons vanilla extract

2 teaspoons ground cardamom

1/2 cup granulated sugar

6 egg yolks

vanilla sugar

DIRECTIONS: 

Heat oven to 300° F. In a medium saucepan, bring the heavy cream and vanilla extract to a simmer, whisking occasionally. Do not boil. Remove pan from heat and let rest 10 minutes. In large bowl, whisk together sugar and egg yolks. Slowly whisk warm cream into egg mixture until smooth. Set 8 ramekins into baking dish with sides. Pour mixture into ramekins so that they are approximately 3/4 full. Pour boiling water into baking dish about half way up sides of ramekins. Bake 40-45 minutes, or until custard is firm. Chill 1 hour. Before serving, evenly sprinkle vanilla sugar on top. Use a kitchen torch to caramelize vanilla sugar. Don’t have a kitchen torch? Place it on the top rack of your oven under the broiler set to low, watching carefully. Top with fresh fruit, and a sprig of mint if desired.

Lemon Crème Brûlée

YIELD: Makes 4 servings

INGREDIENTS:

2 cups heavy cream

6 tablespoons granulated sugar, divided

4 large egg yolks

Zest of 2 lemons

1/2 teaspoon vanilla extract

Pinch of salt

1/4 cup granulated sugar

Fresh berries, for garnish (optional)

DIRECTIONS: 

Preheat oven to 300 degrees F. heat large kettle of water to boiling. Place four 6-ounce ramekins in roasting pan. In small saucepan, heat cream and 3 tablespoons sugar over medium heat 6 to 7 minutes until cream just starts to bubble around edges of pan (do not bring to a full boil).

Meanwhile, in large bowl, whisk egg yolks, lemon zest, vanilla, salt and remaining 3 tablespoons sugar until well combined. While whisking, use ladle to slowly add 3 ladlefuls of hot cream mixture to egg mixture. Gradually whisk remaining cream mixture into egg mixture. Strain mixture through fine mesh strainer into large liquid measuring cup.

Divide mixture between ramekins; place roasting pan in oven. Carefully pour enough boiling water from kettle around ramekins until it comes halfway up sides of ramekins, being careful to not get water in ramekins. Bake 35 to 40 minutes or until custards are just set. Use tongs to carefully transfer ramekins to cooling rack; let stand at room temperature 30 minutes. Cover with plastic wrap and chill at least 4 hours or up to 2 days before serving.

To serve, sprinkle 1 tablespoon sugar over each custard. Using blowtorch, caramelize top of each custard until sugar bubbles and turns brown (this can also be done under a broiler). Top with berries and a sprig of lemon thyme before serving.

Pecan-Topped Raspberry Cake

By Heidi Sutton

Looking for a scrumptious raspberry dessert? From a Pecan-Topped Raspberry Cake, to a Raspberry Whole-Fruit Sorbet and my daughter’s absolute favorite, Swedish Raspberry Almond Bars, these fruity desserts are guaranteed to fit the bill. And with these recipes, you’ll enjoy the flavor of summer all year-round!

Pecan-Topped Raspberry Cake

YIELD: Makes 8 servings

INGREDIENTS:

3/4 cup granulated sugar, plus 1 tablespoon, divided

1/2 cup unsalted butter, softened

2 eggs

1 cup all-purpose flour, sifted

1 teaspoon baking powder

1 teaspoon vanilla

1 bag (12 ounces) frozen raspberries

1/2 cup chopped pecans

1 tablespoon lemon juice

1 teaspoon cinnamon

whipped cream

DIRECTIONS: 

Heat oven to 350 F. In bowl, cream 3/4 cup sugar and butter. Add eggs one at a time and continue beating until well incorporated. Add flour, baking powder and vanilla; beat well. Pour batter evenly into 9- or 10-inch prepared pan. Place frozen raspberries on top of batter. Sprinkle with pecans, remaining sugar, lemon juice and cinnamon. Bake about 1 hour. Remove from oven and let cool. Serve with whipped cream.

Raspberry Whole-Fruit Sorbet

YIELD: Makes 8 servings

INGREDIENTS:

4 tablespoons powdered sugar

18 ounces frozen raspberries

1 egg white, pasteurized

DIRECTIONS: 

In a blender, blend sugar and frozen raspberries until smooth. Add egg white and blend 30 seconds. Serve immediately or place in container, cover and store in freezer.

Swedish Raspberry Almond Bars 

YIELD: Makes 8 servings

INGREDIENTS:

3/4 cup unsalted butter, softened

3/4 cup confectioners sugar

1 1/2 cup flour 

3/4 cup red raspberry jam

3 egg whites

6 tablespoons sugar

1/2 cup coconut

1 cup sliced almonds, divided

DIRECTIONS: 

Cream butter and confectioners sugar with hand mixer until light and fluffy. Add flour, mix well. Press unto bottom of 13” by 9” pan. Bake at 350 degrees for 18 to 20 minutes, until lightly browned. Let cool. Spread jam over crust. Beat egg whites, gradually beat in sugar, 1 tablespoon at a time, until stiff peaks form. Carefully fold in coconut and 1/2 cup of almonds. Spread over jam. Sprinkle with remaining 1/2 cup of almonds. Bake at 350 degrees for 20 minutes, until golden brown.

By Heidi Sutton

July 4th celebrations are much anticipated each year. Whether they include an intimate barbecue with a close-knit group of friends or a massive block party with everyone from the neighborhood, there’s a strong chance that food will be part of the party.

As various menu items will hit the grill, hosts and hostesses may wonder which desserts to serve to make their events complete. While there is seemingly nothing more American than apple pie, cookies also can be sweet ways to help wrap up the festivities. 

Sugar cookies are a universal favorite, and in this recipe for “Fourth of July Cookie Cups” they’re shaped into cups filled with a buttercream frosting. Enjoy this star-spangled showcase, courtesy of “Live Well, Bake Cookies” (Rock Point) by Danielle Rye.

Fourth of July Cookie Cups

YIELD: Makes 24 cookie cups

INGREDIENTS:

Nonstick cooking spray, for greasing pan

11⁄2 cups all-purpose flour, spooned and leveled

1 teaspoon cornstarch

1⁄2 teaspoon baking powder

1⁄4 teaspoon salt

1⁄2 cup (1 stick) unsalted butter, softened

3⁄4 cup granulated sugar

1 large egg, at room temperature

1 teaspoon vanilla extract

Red, white and blue sprinkles, for topping

   Vanilla Buttercream Frosting

1⁄2 cup (1 stick) unsalted butter, softened

11⁄2 cups powdered sugar

1 tablespoon heavy whipping cream or milk

1 teaspoon pure vanilla extract

DIRECTIONS: 

To make the cookie cups: preheat the oven to 350 F. Spray a 24-count mini muffin pan with nonstick cooking spray and set aside. In a large mixing bowl, whisk together the flour, cornstarch, baking powder, and salt. Set aside. In the bowl of a stand mixer fitted with the paddle attachment or in a large mixing bowl using a handheld mixer, beat the butter and granulated sugar together for 1 to 2 minutes, or until well combined.

Mix in the egg and vanilla extract until fully combined, making sure to stop and scrape down the sides of the bowl as needed. Mix in the dry ingredients until just combined. Evenly distribute the cookie dough among all 24 cups in the mini muffin pan, a little more than 1 tablespoon of cookie dough per cup. Press each ball of cookie dough into the cups and smooth it out.

Bake for 11 to 13 minutes, or until the edges of the cookie cups are lightly browned and the tops are set. Remove from the oven, and make an indentation in each cookie using the back of a measuring spoon. Allow to cool in the muffin pan, then carefully remove from the pan and set aside.

To make the vanilla buttercream frosting: In the bowl of a stand mixer fitted with the paddle attachment or in a large mixing bowl using a handheld mixer, beat the butter for 1 to 2 minutes until smooth. Add the powdered sugar, 1⁄2 cup at a time, mixing in each addition until well combined. Add the heavy whipping cream and vanilla extract, and continue mixing until fully combined, stopping to scrape down the sides of the bowl as needed. Pipe the frosting into the cooled cookie cups and top with the sprinkles.

Store the cookie cups in an airtight container at room temperature or in the refrigerator for up to 4 days.

Blueberry Galette

By Heidi Sutton

Blueberries should be a delicious part of people’s daily diets because this flavorful fruit packs a nutritious punch. Blueberries are a great source of antioxidants, which can help the body fend off various illnesses. 

Various pastries showcase blueberries, including the French galette. A galette is not a pie, but more of a freeform crusty cake. However, it is similar to pie, making it a welcome alternative to that popular pastry. This recipe for “Blueberry Galette,” courtesy of the U.S. Highbush Blueberry Council, is a delicious treat that’s perfect for entertaining.

Blueberry Galette

YIELD: Makes two 12-inch galettes

INGREDIENTS:

Crust

3 cups unbleached all-purpose flour

1 1⁄2 teaspoons salt

2 tablespoons sugar

4 ounces lard or shortening, cut into 1⁄2-inch pieces and frozen

1 cup unsalted butter, cut into 1⁄2-inch pieces and refrigerated

1⁄2 cup ice water

1 teaspoon vodka

Filling

8 cups fresh or frozen blueberries

3⁄4 cup sugar, plus 2 tablespoons, separated

31⁄2 tablespoons cornstarch

1⁄4 teaspoon salt

1 lemon, zested

1 tablespoon lemon juice

1 egg

1 tablespoon water

DIRECTIONS: 

To make the crust: Combine the flour, salt and sugar in a food processor. Add the butter and lard. Use the food processor to work the butter and lard into the flour by pulsing it until the butter is in pea-sized pieces. Whisk the water and vodka together and add it to the flour/butter mixture a few tablespoons at a time. It will start to look shaggy, but not dry. It should hold together when you squeeze it in your hand. 

Gently press the dough into a ball using a pastry scraper or your hands. Divide the dough into two pieces and create round disks. Wrap the dough in plastic and refrigerate for at least an hour, or overnight.

To make the filling: In a small bowl, combine 3⁄4 cup sugar, cornstarch, salt, and lemon zest. Massage the zest into the sugar. In a large bowl, toss together the blueberries and lemon juice. Add the sugar/lemon zest mixture and gently stir to coat the blueberries. Line a baking sheet with parchment paper. On a floured surface, roll out the chilled pie dough into a 1⁄8-inch-thick-circle. Dust off any extra flour and lay crust onto the prepared pan.

Mound the blueberry filling in the middle of crust. Fold and crimp the dough up so that it covers at least 2 inches of the filling. Freeze the shaped galette for at least 15 minutes to chill the dough. 

Preheat the oven to 425 F and set rack in middle of the oven. Just before baking, beat the egg and water together and brush the edges with egg wash. Sprinkle crust with the remaining 2 tablespoons of sugar. Bake for 30 minutes, then turn the oven down to 350 F and bake for an additional 30 minutes.

Pineapple Upside Down Cake

By Heidi Sutton

Imagine an old-fashioned dessert that is reminiscent of a simpler time … an airy, buttery vanilla cake with a beautiful caramelized brown sugar topping sweetened with pineapple rings and maraschino cherries. Of course I’m referring to the classic Pineapple Upside Down Cake, the bright flavored spring and summer dessert perfect for casual family dinners and special occasions.

The cake became popular in the United States in the mid-1920s after Dole Pineapple Company sponsored a contest for pineapple recipes and received over 2,500 submissions. The winner was a Pineapple Upside-Down Cake recipe submitted by Mrs. Robert Davis from Norfolk, Virginia. Dole published the recipe in an advertisement, which increased the cake’s popularity.

In honor of National Pineapple Upside Down Cake Day on April 20, here is a recipe for the retro classic dessert that is as delicious today as it was decades ago. The directions call for a large cast-iron skillet. However, you can use any non-stick baking round pan. The cake can be served warm or cold.

Pineapple Upside Down Cake

YIELD: Makes 8 servings

INGREDIENTS:

2/3 cup margarine, divided

2/3 cup packed brown sugar, divided

1 can (20 ounces) Dole Pineapple Slices

10 maraschino cherries

3/4 cup granulated sugar, divided

2 eggs, separated

1 teaspoon grated lemon peel

1 teaspoon lemon juice

1 teaspoon vanilla extract

1 1/2 cups all-purpose flour

1 3/4 teaspoons baking powder

1/4 teaspoon salt

1/2 cup sour cream

DIRECTIONS:

Heat oven to 350° F. In 10-inch cast-iron skillet, melt 1/3 cup margarine. Remove from heat. Add brown sugar and stir until blended.

Drain pineapple slices; reserve 2 tablespoons syrup. Arrange pineapple slices in sugar mixture. Place cherry in center of each slice.

Beat remaining 1/3 cup margarine with 1/2 cup granulated sugar until light and fluffy. Beat in egg yolks, lemon peel, lemon juice and vanilla. Combine flour, baking powder and salt. Blend into creamed mixture alternately with sour cream and reserved pineapple syrup.

Beat egg whites to soft peaks. Gradually beat in remaining 1/4 cup granulated sugar to make stiff meringue. Fold into batter. Pour over pineapple in skillet.

Bake 35 minutes, or until toothpick inserted comes out clean. Let stand 10 minutes, then invert onto serving plate.

Traditional Carrot Cake

By Heidi Sutton

In honor of National Carrot Cake Day, Feb. 3, here is a traditional take on the timeless treat using everyday ingredients. This cake is so easy to make, perfectly moist, and topped with an easy homemade cream cheese frosting. Then try this cream cheese bar recipe that combines the spiced sweetness of traditional carrot cake with creamy, smooth cheesecake for an irresistible dessert.

Traditional Carrot Cake

Traditional Carrot Cake

YIELD: Makes 10 to 12 servings

INGREDIENTS:

2 1/4 cups flour

1 teaspoon baking soda

1/2 teaspoon salt

1 teaspoon cinnamon

1/2 teaspoon baking powder

1 cup vegetable oil

1 1/4 cups sugar

3 eggs

1 1/2 cups carrots, shredded

1 cup crushed pineapple with juice

2/3 cup walnuts

Frosting:

2 packages (8 ounces each) cream cheese

3/4 cup butter, softened

1 teaspoon vanilla extract

5 1/2 cups powdered sugar

DIRECTIONS:

Heat oven to 350 F. In large bowl, sift flour, baking soda, salt, cinnamon and baking powder. In mixing bowl, cream together oil and sugar. Add eggs one at a time. Gradually add in carrots and crushed pineapple. Add dry mixture to wet ingredients and beat until smooth. Fold in walnuts.

Pour batter into two lightly greased 8-inch round cake pans and bake 25-30 minutes, or until knife inserted in center comes out clean. Allow cakes to cool completely. Remove cakes from pans and slice off tops to level cakes.

To make frosting: In mixing bowl, cream together cream cheese, butter and vanilla. Gradually add in powdered sugar and mix until smooth. Spread two large spoonfuls frosting over top of one cake and stack second cake on top. Frost entire cake with remaining frosting.

Carrot Cake Swirled Cream Cheese Bars

Carrot Cake Swirled Cream Cheese Bars

YIELD: Makes 24 bars

INGREDIENTS:

1 cup plus 2 tablespoons flour, divided

2 cups sugar, divided

1 1/2 teaspoons cinnamon

1 teaspoon baking soda

1/2 teaspoon nutmeg

1/4 teaspoon salt

2/3 cup vegetable oil

4 eggs, divided

2 teaspoons vanilla extract

1 1/2 cups finely grated carrots

3 packages (8 ounces each) cream cheese, softened

1/4 cup milk

1 teaspoon lemon extract

DIRECTIONS:

Preheat oven to 325°F. Mix 1 cup each of flour and sugar, cinnamon, baking soda, nutmeg and salt in large bowl. Add oil, 2 eggs, vanilla extract and carrots; mix well. Spread 1/2 of the batter into greased and floured 13×9-inch baking pan. Reserve remaining batter. Set aside.

Beat cream cheese and remaining 1 cup sugar in another large bowl with electric mixer on medium speed until well blended. Add milk, remaining 2 tablespoons flour and lemon extract; beat until well blended. Add remaining 2 eggs, 1 at a time, beating on low speed after each addition just until blended.

Drop spoonfuls of cream cheese mixture and reserved carrot cake batter, alternately, over carrot cake batter in pan. Cut through several times with knife for marble effect.

Bake 40 minutes or until toothpick inserted in center comes out clean. Cool in pan on wire rack.

Double-Chocolate Biscotti

By Heidi Sutton

Biscotti, the “twice baked” cookie treat from Italy, can be a perfect pairing to a cup of coffee or tea. They also make great holiday gifts — simply line a decorative holiday tin with waxed or parchment paper before filling or wrap the biscotti in cellophane and place in a holiday mug.  

Enjoy this recipe for Double-Chocolate Biscotti courtesy of Culinary.net and Almond-Orange Biscotti courtesy of Chef John Nash. To keep the cookies crisp, store them in an airtight container, preferably a tin, and they’ll will keep for up to two weeks. Do not refrigerate.

Double-Chocolate Biscotti

YIELD: Makes 40 cookies

INGREDIENTS: 

3  cups all-purpose flour

1/2 cup cocoa powder

1 1/2 teaspoons baking powder

1/4 teaspoon ground cinnamon

1/4 teaspoon salt

1/2  cup extra light olive oil, plus 1 tablespoon for coating pans

1 cup packed light brown sugar

2 eggs, plus 1 egg yolk

1/3 cup milk

1 tablespoon balsamic vinegar

1 cup semisweet or bittersweet chocolate morsels

DIRECTIONS:

On sheet of waxed paper, combine flour, cocoa powder, baking powder, cinnamon and salt; set aside.

Using electric mixer, beat olive oil with sugar until smooth and light. Add eggs and egg yolk, one at a time, beating until smooth. Add milk and vinegar; beat until smooth. With mixer on low speed, gradually add flour mixture, beating until just combined. Stir in chocolate morsels with large spoon; cover with plastic wrap. Refrigerate at least 4 hours.

Heat oven to 325 F. Grease two large baking sheets with 1/2 tablespoon olive oil each. On lightly floured surface, divide dough into quarters. Roll each piece of dough into log, about 1 1/2 inches in diameter. Place logs on baking sheets, leaving space in between. Bake about 30 minutes, or until golden and set. Transfer to rack; let cool 10 minutes.

Reduce oven temperature to 300 F. On cutting board using serrated knife, cut each log into 3/4-inch-wide slices diagonally. Place slices, cut-side down, on baking sheets. Bake 15-18 minutes, or until toasted. Transfer to racks; let cool.

Almond-Orange Biscotti

YIELD: Makes 36 cookies

INGREDIENTS: 

3 large eggs, separated

1 1⁄2 cups sugar

1⁄3 cup melted butter, cooled

1 cup lightly toasted, coarsely chopped almonds

2 tablespoons Grand Marnier or other orange flavored liqueur

1⁄8 cup chopped, candied orange peel or 3 tablespoons finely grated orange zest

3 1⁄2 cups all-purpose flour

1 1⁄2 teaspoons baking powder

DIRECTIONS:

Beat the egg yolks with 3⁄4 cup sugar until light and sugar is dissolved. Stir in the melted butter, nuts, Grand Marnier, and candied orange. In a separate bowl beat the egg whites until they just begin to form peaks, and gradually beat in remaining 3⁄4 cup sugar until whites form stiff peaks.

Sift flour and baking powder together and alternately fold 1⁄3 of flour and egg white mixtures into yolks until well combined. Dough will be firm and slightly sticky. If dough is too soft, add more flour. With floured hands, divide dough into two logs approximately 11⁄2 inches in diameter. Arrange logs on a buttered or parchment lined baking sheet and bake in a preheated 325 F oven for 20 to 25 minutes or until logs are lightly brown and firm to the touch. Remove from oven and let logs cool on baking pan on a rack for 10 minutes. 

On a cutting board, cut logs crosswise on the diagonal into 1⁄2-inch widths. Arrange biscotti cut side down on baking pan and bake for 5 to 7 minutes on each side or until biscotti are very lightly browned and crisp. Cool on racks and store airtight.

A Sweet Treat for Fall

Fall is about cooler weather, football, sweaters and warm, delicious food. It’s about gathering around the table with loved ones to enjoy a snack or meal and making memories that will last a lifetime. As the weather changes, there are few better places to be than the kitchen, whipping up something amazing for all who are gathered.

This season, when you’re craving something sweet, try this Pumpkin Bread with Chocolate Chips. It’s rich with lots of semi-sweet chocolate chips but also has a prominent pumpkin flavor that is hard to resist.

This recipe is easy to make and provides an opportunity to get the little ones involved in the kitchen. For example, they can stir and pour those yummy chocolate chips into the batter.

Made start to finish in less than an hour, this dessert gives you more time to rake leaves, carve pumpkins and cuddle up by the fireplace.

It can be a perfect treat for get-togethers from parties and events to just a couple friends enjoying each other’s company.

It’s light and moist with a crisp exterior. The signature pumpkin taste blends with the sweet chocolate to create a unique taste perfect for fall.

Find more seasonal dessert recipes at Culinary.net.

Pumpkin Bread with Chocolate Chips

Prep time: 10 minutes

Cook time: 45-50 minutes

Servings: 12

Ingredients:

Nonstick cooking spray

1 1/2 cups all-purpose flour

1/2 teaspoon salt

1/2 teaspoon baking powder

1/2 teaspoon baking soda

2 teaspoons pumpkin pie spice

1 cup canned pumpkin

1/3 cup brown sugar

1/3 cup granulated sugar

1/2 cup vegetable oil

3 eggs, at room temperature

1/2 tablespoon vanilla extract

1 cup semi-sweet chocolate chips

1 cup mini semi-sweet chocolate chips

Directions:

Preheat oven to 350 F. Spray 8-by-4-inch loaf pan with nonstick cooking spray and line with parchment paper. Set aside. In large bowl, whisk flour, salt, baking powder, baking soda and pumpkin spice. Set aside. In medium bowl, combine canned pumpkin, brown sugar, granulated sugar, oil, eggs and vanilla extract. Stir together. Stir wet ingredients into dry ingredients; mix until combined. Fold in chocolate chips.Pour batter into loaf pan. Bake 45 to 50 minutes until toothpick inserted in center comes out clean. Cool at least 10 minutes in pan before removing to wire rack to finish cooling.

Pumpkin Bread with Chocolate Chips

See video here.

Oh-So-Berry Cobbler

A Cobbler Full of Summer Flavors

(Culinary.net) This summer, get a little wild in the kitchen and make something different. It’s alright to mix up the seasonal menu now and again by creating dishes out of the ordinary as a change up from the usual warm-weather favorites.

It’s true for many fruits that the summer months are their ideal season. However, eating fruit plain can be boring and bland on a hot day.

This summer, when heading to an event like a family reunion, picnic or just a day at home, try making this Oh-So-Berry Cobbler.

It’s served warm and is a perfect sweet treat when berries are at their freshest. Full of summer goodness, it’s a treat for everyone to enjoy with strawberries, blackberries, blueberries and a splash of lemon juice served with ice cream. 

Next time you’re thinking about grabbing a fruit tray from the supermarket for an upcoming gathering, think again. This cobbler is the perfect addition to any party menu or special occasion.

Find more summer recipes at Culinary.net.

Oh-So-Berry Cobbler

YIELD: Servings: 8

INGREDIENTS:

2 cups strawberries, sliced

2 cups blackberries

2 cups blueberries

2 tablespoons lemon juice

3 tablespoons cornstarch

2 cups flour

1 teaspoon baking powder

1 teaspoon salt

1 cup butter, softened

1 1/2 cups brown sugar

2 teaspoons vanilla extract

nonstick cooking spray

ice cream

DIRECTIONS:

Heat oven to 350 F.

In large bowl, mix strawberries, blackberries and blueberries then add lemon juice and cornstarch; mix to combine. Refrigerate 20 minutes.

In medium bowl, whisk flour, baking powder and salt. Set aside.

In bowl of stand mixer, beat butter, brown sugar and vanilla extract on medium speed until blended. Gradually add flour mixture until crumbles form.

Spray 9-by-13-inch baking dish with nonstick cooking spray.

Pour berries into bottom of dish. Top berries with crumbles.

Bake 30-40 minutes, or until lightly browned.

Serve with ice cream.

See video here: