Cooking

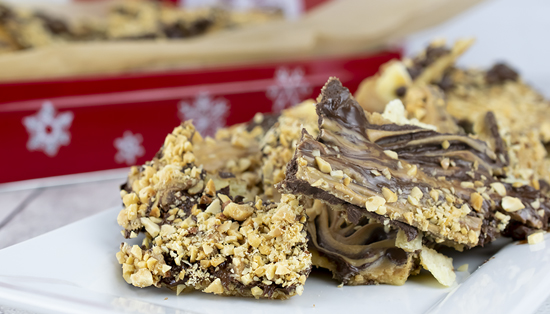
Peanut Butter Saltine Candy

Holiday Sweets Made to Share

(Family Features) Among the decorations, gifts and gatherings of loved ones, there’s perhaps nothing quite like family favorite foods that call to mind the joy of the holidays. Whether your loved ones relish building gingerbread houses or dining on an all-in feast, looking forward to annual traditions is part of what makes the season so special.

This year, you can add to the fun with a new annual activity by creating a delightful dessert with the help of little ones and adults alike. With an easy recipe like Peanut Butter Saltine Candy that calls for just a handful of ingredients, you can get the whole family involved in the kitchen.

Ask your little helpers to measure out ingredients while a grownup prepares the pan and uses the stove. Once the base is finished baking, call the kids back to sprinkle chocolate chips and peanut butter chips over the top.

After your candy creation is cooled, just break it into pieces meant to be shared with the entire family. An added benefit: all can enjoy the nutrient-rich flavor of peanuts, which rise to superfood status by delivering 19 vitamins and minerals and 7 grams of protein per serving.

Find more holiday recipes at gapeanuts.com.

Peanut Butter Saltine Candy

Yield: 45 pieces

Ingredients:

Nonstick cooking spray (butter flavor)

1 sleeve (4 ounces) regular saltine crackers

1/2 cup butter

3/4 cup creamy peanut butter

1 cup granulated sugar

2 cups milk chocolate chips

1/2 cup peanut butter chips

1/2 cup rough chopped, dry roasted peanuts

Directions:

Preheat oven to 400 F. Line 10-by-15-by-1-inch pan with aluminum foil. Spray foil with nonstick cooking spray then lay saltines flat in single layer on prepared pan. Set aside.

In heavy duty, 1-quart saucepan over medium heat, combine butter, peanut butter and sugar. Stir constantly until butter and sugar are melted, bringing mixture to boil. Boil 3 minutes, stirring frequently. Pour cooked mixture over saltines and bake 5 minutes.

Remove from oven and sprinkle chocolate chips over saltines. Let cool 3 minutes then spread melted chocolate completely over saltines.

Sprinkle peanut butter chips evenly over chocolate. Return pan to oven 1 minute to soften chips. Pull pointed tines of fork through softened peanut butter chips to partially cover chocolate. Sprinkle chopped peanuts on top, gently pressing into candy.

Let cool on rack about 15 minutes then place in freezer 3 minutes. Remove from freezer and break into pieces. Store in airtight container.

See video for recipe here.

Pixabay photo

By Barbara Beltrami

The candy cane, that red and white Christmas phenomenon, as emblematic of the holiday as Santa and his reindeer or bauble-festooned evergreens, is one of my favorite ingredients when creating holiday confections. Its cool peppermint flavor echoes the air outside and its  sweetness appeals to kids and grownups alike. Candy cane meringue kisses and fingerprint cookies make lovely treats for wrapping up as gifts or swapping at cookie exchanges while a candy cane cheesecake with a chocolate crust combines three winning flavors in one beautiful dessert. So go ahead, swipe a few candy canes from the tree and start baking.

Candy Cane Meringue Kisses

Candy Cane Meringue Cookies

YIELD: Makes about 3 dozen

INGREDIENTS: 

2 large egg whites at room temperature

1/8 teaspoon cream of tartar

1/8 teaspoon fine salt

1/2 cup sugar

2 candy canes, finely crushed

DIRECTIONS: 

Preheat oven to 225 F. Line baking sheets with parchment. Put egg whites in large bowl and add cream of tartar and salt; beat until foamy. Add sugar, one tablespoon at a time, beating on high after each addition; continue beating until stiff, glossy peaks form. Transfer mixture to piping bag and pipe 1 1/2” cookies 2 “ apart onto parchment; sprinkle evenly with crushed candy canes and bake 1 1/2 to 2 hours until firm but not brown; transfer to wire racks to cool; store in airtight container.  Serve with peppermint tea or hot chocolate.

Candy Cane Fingerprint Cookies

Stock photo

YIELD: Makes about 4 dozen

INGREDIENTS: 

48 candy cane kisses

4 – 5 candy canes, finely crushed

1 cup unsalted butter, at room temperature

1 cup sugar

1 large egg at room temperature

1 tablespoon milk

1 teaspoon vanilla extract

3 cups flour

2 teaspoons baking powder

1/4 teaspoon salt

DIRECTIONS: Place candy kisses in a covered container and freeze for at least one hour. Preheat oven to 350 F. Line baking sheets with parchment. In a large bowl cream butter and sugar until light and fluffy; beat in egg, milk and vanilla. In another large bowl sift together flour, baking powder and salt; gradually beat into other mixture. Shape into one-inch balls and roll each one in crushed candy canes; place two inches apart on parchment and bake 10 to 12 minutes, until bottoms are golden brown. Remove from oven and immediately make an indentation with your finger and press a candy cane kiss into center of each cookie. Transfer to wire racks. Serve with egg nog or Irish coffee.

Candy Cane Cheesecake

YIELD: Makes 12 to 16 servings

INGREDIENTS: 

2 1/2 cups crumbled chocolate wafers

1/3 cup unsalted butter, melted

Six 8-ounce packages cream cheese, softened

1 1/3 cups sugar

1 cup sour cream

3 tablespoons flour

1 tablespoon vanilla extract

1 teaspoon peppermint extract

3 large eggs, lightly beaten

10 ounces chocolate chips

12 ounces heavy cream, whipped

4 candy canes, crushed

DIRECTIONS: 

Preheat oven to 325 F. Grease a 9” springform pan, then tightly wrap the outside with two layers of aluminum foil. In a small bowl combine chocolate wafers and melted butter and press mixture into bottom and one inch up sides of pan; set on a rimmed baking sheet and bake 12 to 15 minutes, until set; cool on wire rack.  

In a large bowl beat 5 of the packages of cream cheese with one cup of the sugar until smooth; beat in sour cream, flour and extracts; add eggs and beat on low speed just until combined; fold in chocolate chips, then pour mixture into chocolate crust. Place pan in roasting pan to which one inch hot water has been added. Bake 1 1/4 to 1 1/2 hours, until center is set and top is no longer shiny. Cool on wire rack 30 minutes; run knife around edge to loosen cake, then cool one hour longer; refrigerate overnight, then remove sides of pan. 

For the topping, beat together remaining 8 ounces cream cheese and one-third cup sugar until smooth; fold in whipped cream and 3/4 of the crushed candy canes.  Spread mixture over top of cake; sprinkle remaining candy canes on top.  Refrigerate until ready to serve. Serve with peppermint schnapps.

METRO photo

Gingerbread cookies and houses are one of the many symbols of the holiday season, alongside Christmas trees and twinkling lights. In fact, few confections symbolize the holidays more so than gingerbread. Many a child (or a child at heart) has spent hours carefully trying to create decorative gingerbread houses.

Although gingerbread recipes span various cultures, gingerbread houses originated in 16th century Germany. The fairy tale “Hansel and Gretel” helped solidify the popularity of gingerbread, which became part of Christmas traditions.

Even though gingerbread houses can be fun to make, there’s no denying it can be exacting work — especially for those who strive for perfection. Prepackaged kits attempt to take some of the guesswork out of the equation, but those who are crafting from scratch can employ these tips as they build their gingerbread houses.

• Go for form and not flavor. Few gingerbread houses ever get eaten, so focus on finding a dough that will bake up rock hard as opposed to one that tastes good.

• Get the right icing texture. Pastry artist Catherine Beddall says royal icing is the preferred “glue” to adhere gingerbread pieces. Beddall says icing should be thick like peanut butter and not runny.

• Mind the dough. Do not roll out the gingerbread dough too thin or it may become brittle after being cooked. Always cut out shapes before the gingerbread is baked. Let the baked pieces sit overnight to cool completely before using them to build.

• Patience is key. Allow the icing to dry for at least a couple of hours after adhering each piece and before moving and handling the house, says Beddall. Work in stages so that individual items can be decorated and allowed to dry. Then the walls can be put together, followed by the roof pieces.

• Kids likely will need help. Children may not have the patience or steadiness to handle complete gingerbread construction. They can decorate the separate pieces of the house while the components are laying flat, which is easier for kids. Adults can do the main assembly later on.

• Utilize a template. Free-handing may not be easy. Cut out templates using cardboard or posterboard for various gingerbread pieces.

One of the most important tips is to have fun. Don’t take gingerbread house making too seriously as a novice. Rather, enjoy the experience and the centuries-old tradition.

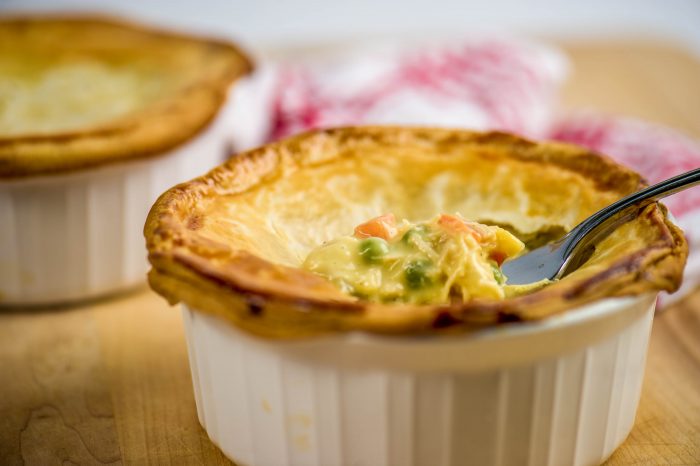
Chicken Pot Pie

By Barbara Beltrami

Despite unseasonably warm fall days, there’s been a real chill in the air and some gusty winds lately. The leaves have finished their autumn pageant, the days are shorter and it’s time for some serious comfort food like pot pies. In fact, I can’t think of anything that would hit the spot more on a dark December evening. With the convenience of a pie crust from the refrigerator or frozen food section of the supermarket, you can concentrate on that savory concoction that goes under the crust, pop the whole thing in the oven and sip a glass of wine while you catch up on your emails.

Chicken Pot Pie

Chicken Pot Pie

YIELD: Makes 6 servings

INGREDIENTS: 

Nonstick cooking spray

4 refrigerated pie crusts

1/2 cup unsalted butter

1/2 pound fresh mushrooms, cleaned and sliced

1 medium potato, peeled and diced

1 medium onion, chopped

1 medium carrot, peeled and diced

1/4 cup chopped flat leaf parsley

1/4 cup flour

2 1/2 cups chicken broth

Salt and freshly ground pepper to taste

6 boneless skinless chicken breast halves, poached and shredded

1 cup frozen peas

1/2 cup heavy cream

1/4 cup milk

DIRECTIONS: 

Preheat oven to 400 F. Spray 6 ramekins with nonstick cooking spray. On lightly floured surface, cut six 5” circles from two rolled out pie crusts, then roll each circle into an 8-inch round. Line bottoms and sides of 6 ramekins with 8” crusts; crimp around top edges and prick bottoms and sides of dough with a fork. Place ramekins on rimmed baking sheet and bake for about 15 minutes, until dough is lightly browned. 

Meanwhile in a large skillet melt butter over medium-high heat; add mushrooms, potato, onion, carrot, and parsley and stir occasionally until onions turn a light golden color, about 6 to 8 minutes. In a small bowl, whisk together flour and half a cup of the broth; add to skillet, stir, then add remaining two cups of broth, salt and pepper and bring to a boil; reduce heat to medium, stir occasionally and simmer another 5 minutes; stir in chicken, peas and cream, let sit 10 minutes. 

Distribute filling mixture evenly among the six ramekins; cut and roll second two pie crusts as first ones, crimp edges, make slits in top crusts, brush tops with milk and bake on rimmed baking sheet, until crusts are golden, about 25 to 30 minutes. Serve with a crisp green salad.

Seafood Pot Pie

YIELD: Makes 4 to 6 servings

INGREDIENTS: 

1 stick unsalted butter

1 large onion, chopped

1 cup chopped celery with leaves

1/2 cup flour

3 cups clam juice

1/2 pound large shrimp, peeled and deveined

1/2 pound bay scallops

Salt and freshly ground pepper to taste

1/4 cup heavy cream

1 pound lobster meat, cut into bite-size pieces

One 10-ounce package frozen peas and carrots

One 10-ounce package frozen pearl onions

1/2 cup finely chopped flat leaf parsley

One 9” uncooked pie crust, rolled out

3 tablespoons milk

DIRECTIONS: 

Preheat oven to 375 F. In large skillet melt butter over medium heat; add onion and celery and cook until onion is opaque, about 5 to 7 minutes. Add flour, stir and cook another minute. In large saucepan bring clam juice to a simmer over medium-high heat; add shrimp and scallops and cook just until shrimp are pink and scallops are tender, about 2 minutes. With slotted spoon transfer shrimp and scallops to bowl, but reserve cooking liquid. 

Go back to the skillet and, stirring constantly, add cooking liquid, salt and pepper, a little at a time, to onion and celery and cook 3 minutes. Add the cream and stir. Add lobster meat along with shrimp, scallops and onion mixture, then stir in frozen peas, carrots, pearl onions and parsley; transfer to deep pie dish, cover with rolled out pie crust and crimp edges; brush with milk and make a few slits in crust. Place pie on rimmed cookie sheet and bake until crust is golden and filling is bubbly, about 1 1/4 hours. Serve with an arugula and endive salad.

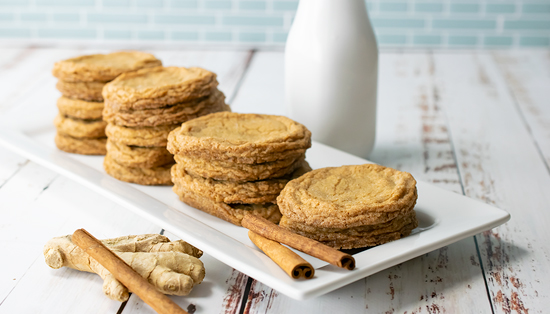
Ginger Cookies

Showstopping Cookies with a Crunch

(Culinary.net) Sweet treats are a favorite food, especially when they have a unique or unusual twist that makes them stand out from the crowd. When a dessert isn’t the classic chocolate or vanilla flavor, it can pique eaters’ interest. Cupcakes, macaroons and even pies have some intense flavors, however, it’s hard to top the delightful taste of these Fresh Ginger Cookies.

They are sweet and sugary with the perfect amount of ginger. Baked until golden brown, this dessert is a showstopper for family events and celebrations alike. Even the little ones will love to munch on this sweet treat with fresh, appealing flavor.

From parties to picnics, these cookies can be a hit. They are simple to make, don’t take much time to bake and are unique enough to bring along to nearly any occasion. With ground and fresh ginger, these cookies are equally as appetizing as they are satisfying and sure to turn heads in the kitchen.

Fresh Ginger Cookies

Yield: Serves 24

Ingredients: 

2  cups flour

1 1/2 teaspoons baking soda

1 1/2 teaspoons ground ginger

1 teaspoon ground cinnamon

1/8 teaspoon salt

3/4 cup salted butter, softened

1 cup, plus 3 tablespoons, sugar, divided

1/4 cup brown sugar

1 egg

1/4 cup grated fresh ginger

Directions:

Heat oven to 350 F. In medium bowl, whisk flour, baking soda, ground ginger, cinnamon and salt. Set aside. In stand mixer, beat butter, 1 cup sugar and brown sugar until fluffy. Add egg and fresh ginger; beat until combined. Gradually add dry ingredients to mixer until combined. In small bowl, add remaining sugar. Using spoon, portion out dough, roll into balls then roll in sugar. Arrange balls on baking sheet at least 1 inch apart. Bake 14 minutes, or until edges are golden brown. Transfer cookies to cooling rack and cool completely

See video here.

Find more sweet treat recipes at Culinary.net.

If you made this recipe at home, use #MyCulinaryConnection on your favorite social network to share your work.


Stock photo

By Barbara Beltrami

You know, for a long time now, Jewish cuisine around here has been mostly from descendants of Central European and Russian immigrants; consequently, when we think of Hanukkah, the eight-day Festival of Lights, we think of traditional holiday fare passed down from ancestors who came from those countries. 

But there are Jewish populations all over the world, and some of them have immigrated here in recent years and brought their own holiday fare with them. So this year, I’m going to integrate their traditions into my Hanukkah menus, and I hope you will too. 

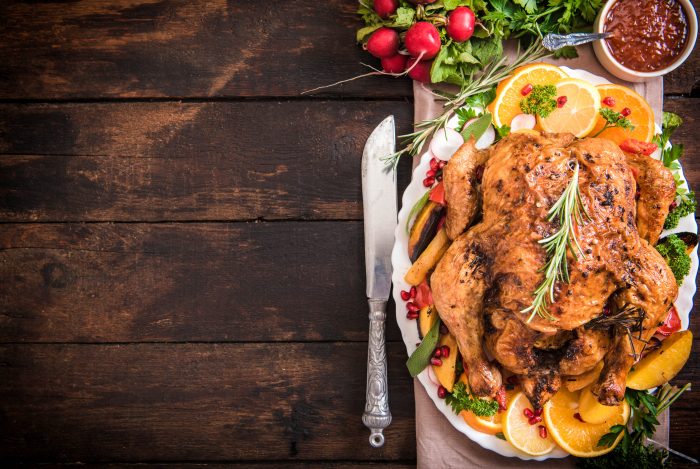
I’m thinking that the ubiquitous roast chicken is the perfect way to highlight the special flavors of various other Jewish cuisines. A favorite version of that would be one with dried fruit and almonds from Morocco or a lemony Mediterranean one. But I’d also love to try a recipe for Chinese roast chicken that I am told goes back to the Jewish colony in Shanghai many years ago. Can I make roast chicken three out of the eight nights of Hanukkah? The flavors are all so different, why not?

Moroccan Roast Chicken

YIELD: Makes 4 servings

INGREDIENTS: 

1/4 cup olive oil

1 1/2 pounds onions, thinly sliced

1 cup dried apricots

1 cup pitted prunes

3/4 cup dried dates

2 tablespoons sugar

1/2 teaspoon cinnamon

One 4 to 5 pound whole chicken, rinsed and patted dry

1/2 teaspoon turmeric

Kosher salt and freshly ground black pepper to taste

3/4 to 1 cup water

1/3 cup toasted slivered almonds

DIRECTIONS: 

In large cast iron skillet heat half the oil over medium-high heat; add onions and, stirring occasionally, cook until deep golden brown, about half an hour. Transfer to large bowl, add dried fruit, sugar and cinnamon. Preheat oven to 350 F. Spread fruit mixture over bottom of large roasting pan. Rub chicken with remaining oil, turmeric, and salt and pepper; pour water around chicken and roast for one hour. 

Rotate pan and add more water, a little at a time, if fruit mixture is starting to dry out; roast another 45 minutes, until chicken is browned and juices run clear when thigh joint is pierced. Let rest 10 minutes before carving. Transfer with any juices to warmed platter, sprinkle with almonds, arrange fruit around edges and serve with Israeli couscous. 

Mediterranean Roast Chicken

YIELD: Makes 4 servings

 INGREDIENTS: 

1/4 cup olive oil

Juice from one freshly squeezed lemon

Grated zest from one lemon 

3 tablespoons fresh rosemary leaves

Kosher salt and freshly ground black pepper to taste

One 3 1/2 to 4 pound roasting chicken, washed and patted dry

4 garlic cloves

1 onion, quartered

DIRECTIONS: 

Preheat oven to 425 F. In a small bowl combine the oil, lemon juice, lemon zest, rosemary, salt and pepper; rub mixture inside chicken cavity and all over outside of chicken. Stuff cavity with remains of lemon, garlic and onion, sprinkle outside with more salt and pepper and place breast side up on rack in roasting pan. Roast 50 to 60 minutes, until skin is dark golden and juices run clear when thigh joint is pierced with a fork. Serve with roasted potatoes.

Shanghai Roast Chicken

YIELD: Makes 4 to 6 servings

INGREDIENTS: 

1/2 cup soy sauce

1/4 cup lemon juice

2 tablespoons honey

2 tablespoons sesame oil

1 teaspoon dried mustard

1 teaspoon ground ginger

2 garlic cloves, minced

1/2 teaspoon crushed red pepper flakes

1 whole 4 to 5 pound roasting chicken, rinsed and patted dry

DIRECTIONS: 

In small bowl, whisk together all ingredients except the chicken. Transfer to large resealable bag; add chicken and turn to evenly coat with spice mixture. Rotating every few hours, refrigerate for at least 12 hours. Preheat oven to 350 F. Reserving marinade, place chicken on wire rack in roasting pan and roast 1 1/4 to 1 1/2 hours until dark golden brown and thigh juices run clear when pierced with a fork. 

In medium saucepan, heat marinade to boiling and occasionally baste chicken with it. Remove from oven, let sit 10 minutes, then carve and serve with rice and grilled scallions.

A Sweet Sauce to Savor

(Culinary.net) There are few things better than festive holiday celebrations. Everyone is gathered around the table, ready to eat and enjoy the company. The atmosphere is joyful, the decorations are beautiful and the food is absolute perfection.

From warm casseroles to hearty proteins, most spreads are made of an array of colors with mouthwatering sides and desserts. However, there are some dishes the holidays just can’t happen without. One is a classic, traditional Sweet Cranberry Sauce. It’s popping with color and texture. Plus, it makes everything it tops taste just a little bit better.

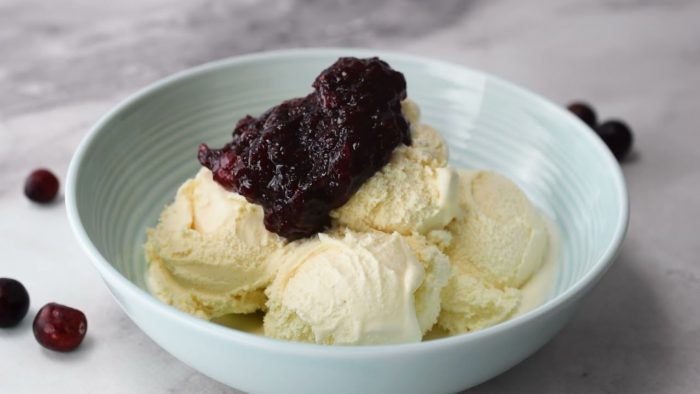
This sauce is perfect for nearly any holiday celebration but is also a sweet treat that can be served over vanilla ice cream for dessert. It’s fruity with a hint of citrus and flavorful with a dash of ground cinnamon and a bit of ginger.

This recipe works well into the holiday season. It’s a timeless dish but with a fresh and tangy twist that’s perfect for both gatherings with many guests or simple nights at home with those leftovers you just can’t resist.

Find more recipes perfect for celebrating the holidays at Culinary.net.

If you made this recipe at home, use #MyCulinaryConnection on your favorite social network to share your work.

Sweet Cranberry Sauce

Prep time: 2 minutes

Cook time: 10 minutes

Servings: 8

Ingredients:

12 ounces cranberries

1 cup granulated sugar

1/4 cup orange juice

1/2 cup water

1 1/2 tablespoons ginger paste

1/8 tablespoon salt

1/4 teaspoon ground cinnamon

2 tablespoons orange zest

vanilla ice cream (optional)

Directions:

In large skillet over medium heat, combine cranberries, sugar, orange juice, water, ginger paste, salt, ground cinnamon and orange zest.

Bring to simmer. Stir until thickened to desired consistency, 15 minutes.

Cool 30 minutes. Transfer to bowl. Cover and refrigerate 30 minutes. Serve alone or over vanilla ice cream, if desired.

Watch video here.

METRO photo

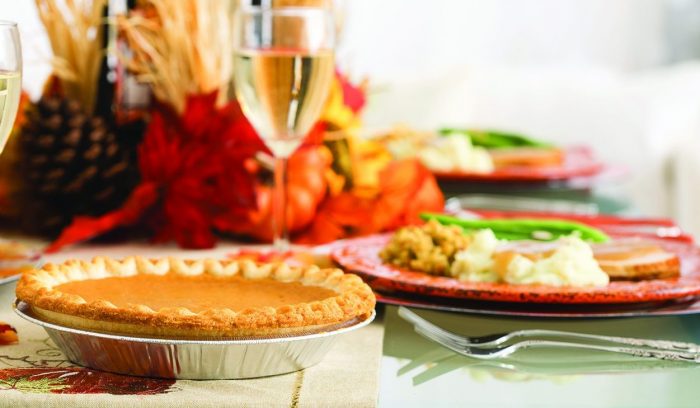
Preparing Thanksgiving dinner for a houseful of close friends and relatives can be a tad overwhelming. Thanksgiving is a food- and tradition-centric holiday, and all eyes will are typically on the dinner table. Pulling off a feast of this magnitude — multiple courses, side dishes and desserts — takes considerable effort. These tips, tricks and timesavers can be a Thanksgiving host’s saving grace.

Pick the menu early

Don’t leave menu planning and shopping to the last minute. Decide what you’ll be cooking in addition to turkey several weeks before the big day. Select two or three side dishes, preferably items that can be prepared in advance and then reheated on Thanksgiving. These can include a baked macaroni-and-cheese casserole, mashed potatoes, roasted vegetables, and a cornbread stuffing.

Brine your bird

Turkey is the centerpiece of the feast, so give it every opportunity to shine. No one wants a dry turkey, but unfortunately this lean poultry can dry out easily. Meats typically lose about 30 percent of their weight during cooking. However, by soaking the turkey in a brine prior to cooking it, you can reduce this moisture loss to as little as 15 percent, according to Dr. Estes Reynolds, a brining expert at the University of Georgia. Brining the fowl for a day or more can infuse flavor and moisture. Food Network personality Alton Brown has a fan-favorite roast turkey recipe with an aromatic brine that has garnered five stars and was featured on his show “Good Eats” (www.foodnetwork.com/recipes/alton-brown/good-eats-roast-turkey-recipe-1950271). A simple salted water soak also can work.

Start prep work a few days before Thanksgiving

Take some stress out of Thanksgiving by cutting all vegetables and/or preparing some dishes a few days early. Label and organize prepared ingredients by recipe and store in the refrigerator. Make extra room in the fridge by removing nonessential items and placing them in a cooler with ice and cleaning out any old food or condiments. Plan your table settings and label which bowls and other serving dishes will be used for which items. This will make it much easier to set the table on Thanksgiving.

Serve batched cocktails

It can be challenging and expensive to have a full bar for guests. Mulled wine, hot cider and punches are ideal ways to service a crowd looking for delicious spirited drinks.

Create simple centerpieces

Use seasonal sights for your centerpieces or place settings. These can include small squashes, gourds, citrus fruits, nuts, or acorns. A hollowed-out pumpkin filled with fresh flowers also can be eye-catching. Thanksgiving is a time to celebrate bounty. Treat guests to a great experience by learning some hosting tips to make the holiday easier to manage.

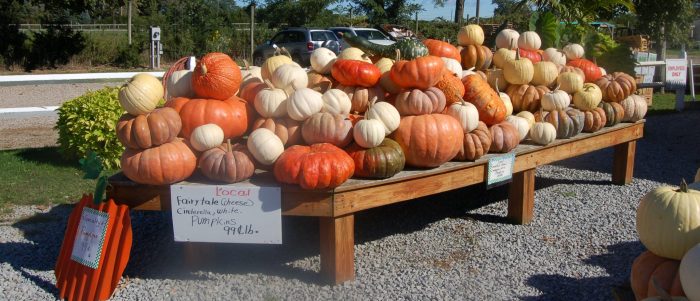
A farm stand along Sound Avenue in Riverhead with many edible varieties of pumpkins for sale. Photo by Heidi Sutton

By Barbara Beltrami

As far as I can tell it’s the pumpkin pie filling that everyone craves. Since it’s really nothing more than a pudding or custard, why not forget about the crust and go straight to the filling with pumpkin rice pudding, pumpkin-peanut parfait or pumpkin custard? The farm stands still have pumpkins galore and one I stopped at had a sign that said that all pumpkins are edible. So there’s no need to wait till Thanksgiving for your pumpkin fix; grab one or two modest sized ones or pick up a can of pumpkin puree at the supermarket to treat your family or guests to a smooth and creamy pumpkin dessert. 

Pumpkin – Ginger Snap Rice Pudding

YIELD: Makes 8 servings

INGREDIENTS: 

2 cups water

1 cup arborio rice

3 cups milk

1 cup pumpkin puree

3/4 cup honey

1 teaspoon vanilla extract

1 teaspoon cinnamon

1/2 teaspoon ground ginger

1/4 teaspoon ground nutmeg

Pinch of salt

1 1/2 cups crumbled ginger snaps

8 whole ginger snaps

1/2 pint whipped cream

DIRECTIONS: 

Preheat oven to 375 F. In a large ovenproof saucepan bring the water to a boil; stir in rice, cover and simmer until most of the water has been absorbed, about 20 minutes. In a large bowl whisk together the milk, puree, honey, vanilla, cinnamon, ginger, nutmeg and salt. Immediately add pumpkin mixture to hot rice; stir well; cover and place saucepan in oven. Bake until liquid is reduced by one third and mixture is bubbly and foamy, about 45 minutes. Remove from oven, stir well, transfer to large bowl and refrigerate for at least 8 hours. When ready to serve, spoon mixture and crumbled ginger snaps in alternating layers into wine glasses or stemmed dessert dishes; top with whipped cream and garnish with whole gingersnaps. Serve with hot apple cider.

Pumpkin-Peanut Parfait

YIELD: Makes 6 servings

INGREDIENTS: 

4 cups milk

1 1/2 cups pumpkin puree

1 teaspoon cinnamon

1/2 teaspoon ground allspice

1/4 teaspoon ground cloves

1 teaspoon ground ginger

1 1/4 cups sugar

1/3 cup cornstarch

1/2 teaspoon salt

5 egg yolks

1 teaspoon vanilla extract

2 tablespoons unsalted butter

1 1/3 cups chopped salted peanuts

DIRECTIONS: 

In a medium saucepan combine 3 cups of the milk, puree, cinnamon, allspice, cloves and ginger; whisk to combine then cook  to a simmer over medium-low heat. In a large bowl whisk together sugar, cornstarch, salt, egg yolks and remaining cup milk. Whisk half the hot milk-pumpkin mixture into the egg mixture, then transfer back to saucepan and whisk to combine with remaining hot milk mixture. Continue to cook, stirring constantly, over medium heat until mixture boils; continue to cook, still whisking constantly, until mixture thickens, about 4 minutes. Remove from heat and stir in vanilla and butter. Layering alternately with peanuts, transfer to stemmed glasses, then refrigerate covered, at least two hours.  Serve with whipped cream.

Pumpkin Custard

YIELD: Makes 4 servings

INGREDIENTS: 

3/4 cup pumpkin puree

2 large eggs

12 ounces evaporated skim milk

1 teaspoon vanilla

1/2 cup brown sugar

2 teaspoons cornstarch

1/2 teaspoon cinnamon

1/2 teaspoon ground ginger

Pinch salt

DIRECTIONS: 

Preheat oven to 350 F. In a large bowl whisk together the pumpkin puree, eggs, milk and vanilla. In another large bowl combine the sugar, cornstarch, cinnamon, ginger and salt. Sift sugar mixture into pumpkin mixture; stir until dry ingredients are completely absorbed; pour into 3/4-cup custard dishes. Place custard dishes in 9” x 13” oven dish and fill it with enough hot water to reach halfway up dishes. Bake 45 to 50 minutes, until custard is set and top is nicely browned. Transfer custard to wire racks to cool. Serve with crème fraîche.

Photo from Statepoint

If your casual baking hobby has turned into an obsession, you’re in good company. Baking swept the nation as a way to pass the time in 2020, with an overwhelming 84% of respondents identifying as bakers in an end-of-year Packaged Facts survey of Americans.

However, there’s a difference between good and great baking, and it all starts with what’s in your pantry. According to the Baking at Home experts, here are seven must-have items you need to take your at-home recipes for breads, cobblers, cakes and more to the next level, as well as tips for using these pantry essentials to their fullest potential.

1. A flour-based baking spray: As every home baker knows, one of the trickiest steps of any recipe is the final one – releasing your treat from the pan without damaging it. If you’ve had a few failed attempts, you may have seen your creations go from masterpieces to flops in just a few short, heartbreaking seconds. To stick the landing every time, (and never see your efforts go to waste again) try using a flour-based baking spray like Baker’s Joy for an easy release from the pan, and faster, more successful baking overall.

2. Shortening: While many view shortening and butter as interchangeable, they’re not the same. Be sure to reach for shortening any time you want your recipe to rise high and retain its shape or to attain that perfect flaky pastry or crust. Making plant-based swaps? An all-vegetable shortening like Crisco can be successfully used in place of butter for an all-vegetable twist on classic recipes.

3. Baking powder: The workhorse of many recipes, one can’t overstate the importance of a dependable, double-acting baking powder. To that end, stick with tried-and-true brands like Clabber Girl, which has been making pastry perfection for over 100 years. Pro tip: quickly test baking powder’s efficacy by mixing a teaspoon with hot water. No fizzing reaction? Time to toss it.

4. Baking soda: Baking soda is the wild and more potent cousin of baking powder, so it’s important not to get them mixed up, especially as baking soda is often specifically called for in recipes containing an acid (think buttermilk and citrus.) While there are many liberties you can take in the kitchen, guessing how much baking soda to use is not one of them. Always measure the exact amount listed to avoid a bitter taste in your finished product.

5. Premium spices, seasonings and herbs: Any serious baker worth their salt will have a “go big or go home” mentality when it comes to spices. Give dishes extra depth by culling your collection to include only high-quality selections that pack a punch, like Spice Islands. Remember, keeping spices dry prolongs flavor, so place your rack in a cool, dry place away from oven heat.

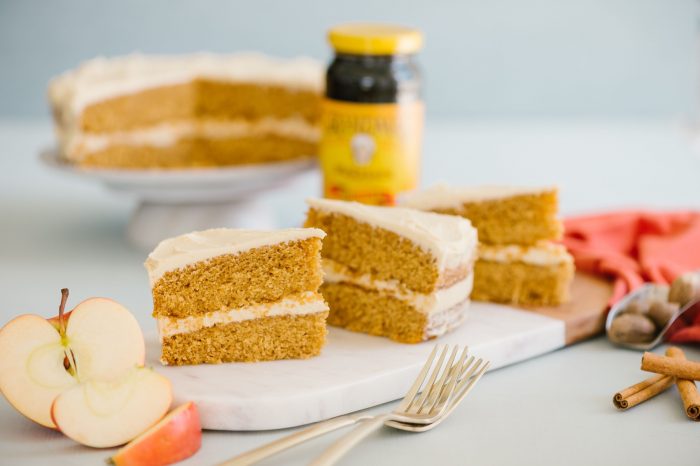
6. Molasses: When mixed with white sugar, molasses can make a great substitute for brown sugar, but that’s just one of its many uses. A pantry staple and American tradition, it’s vital in dishes where moist consistency and depth of flavor are essential, such as pecan pie or gingerbread. Molasses from iconic brands like Grandma’s Molasses can also be the oohs-and-aahs-provoking secret ingredient that has friends and family reaching for seconds.

7. Vanilla extract: Whether you’re cutting back on added sugars or you’re simply low on the sweet stuff, you can use vanilla extract as a flavorful, better-for-you sugar substitute.

With a well-stocked pantry and a good understanding of your ingredients, your creations will come out just the way you want them, every time.

For more baking tips, as well as recipe ideas and tutorials, visit bakingathome.com.